No Image

Замена узла зажигания цепной пилы Echo CS590 2019

СОДЕРЖАНИЕ
84 просмотров
12 декабря 2023

Введение

Используйте это руководство для замены узла зажигания в вашей цепной пиле Echo CS-590 (2019). Узел зажигания включает в себя катушку зажигания, маховик и ключ woodruff.

Хотя снимать направляющую шину необязательно, настоятельно рекомендуется сделать это, чтобы минимизировать повреждения цепи и себя.

Шаг 1 Выключите бензопилу

Echo Chain Saw CS590 2019 Ignition Assembly Replacement, Turn off the chainsaw: step 1, image 1 of 2Echo Chain Saw CS590 2019 Ignition Assembly Replacement, Turn off the chainsaw: step 1, image 2 of 2

Перед началом ремонта убедитесь, что выключатель зажигания выключен.

Бензопила должна быть прохладной на ощупь, прежде чем продолжать работу.

Шаг 2 Ослабьте крышку воздушного фильтра

Echo Chain Saw CS590 2019 Ignition Assembly Replacement, Loosen the air filter cover: step 2, image 1 of 2Echo Chain Saw CS590 2019 Ignition Assembly Replacement, Loosen the air filter cover: step 2, image 2 of 2

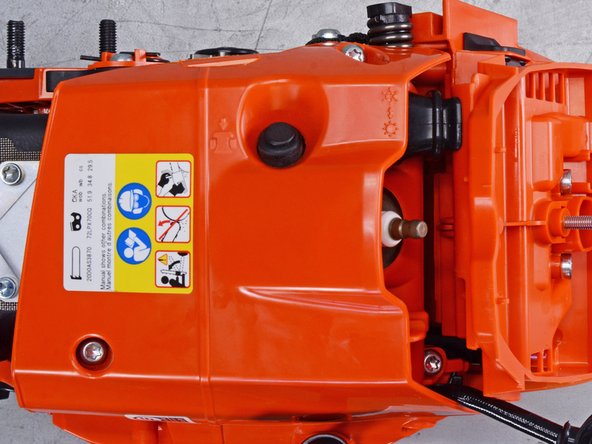
Пальцами ослабьте ручку крышки воздушного фильтра.

Шаг 3

Echo Chain Saw CS590 2019 Ignition Assembly Replacement: step 3, image 1 of 3Echo Chain Saw CS590 2019 Ignition Assembly Replacement: step 3, image 2 of 3Echo Chain Saw CS590 2019 Ignition Assembly Replacement: step 3, image 3 of 3

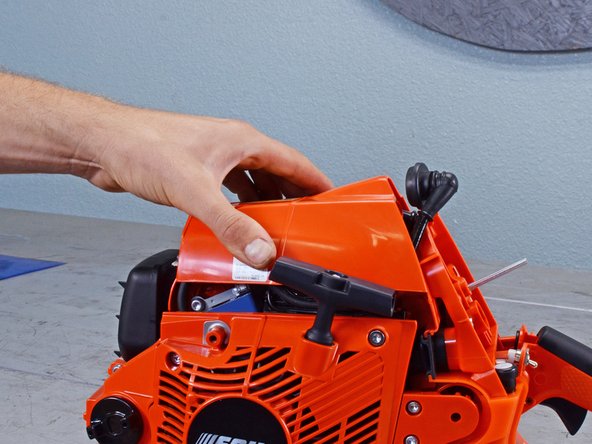
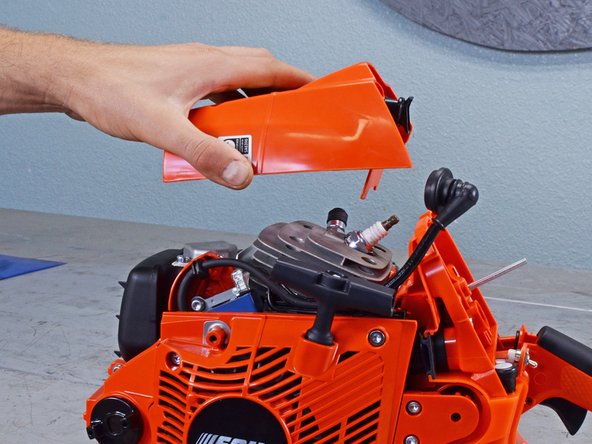
Снимите крышку воздушного фильтра.

Шаг 4 Отсоедините свечу зажигания

Echo Chain Saw CS590 2019 Ignition Assembly Replacement, Disconnect the spark plug: step 4, image 1 of 3Echo Chain Saw CS590 2019 Ignition Assembly Replacement, Disconnect the spark plug: step 4, image 2 of 3Echo Chain Saw CS590 2019 Ignition Assembly Replacement, Disconnect the spark plug: step 4, image 3 of 3

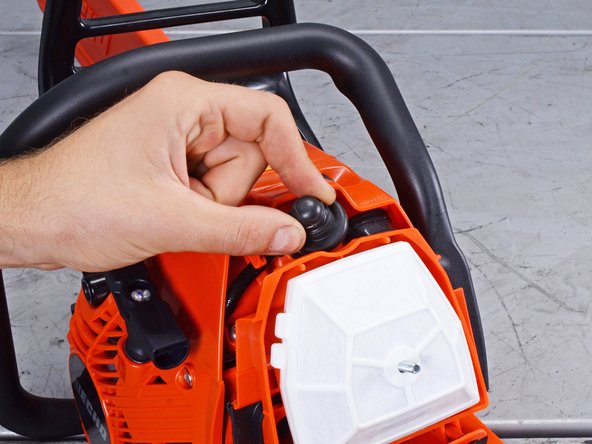
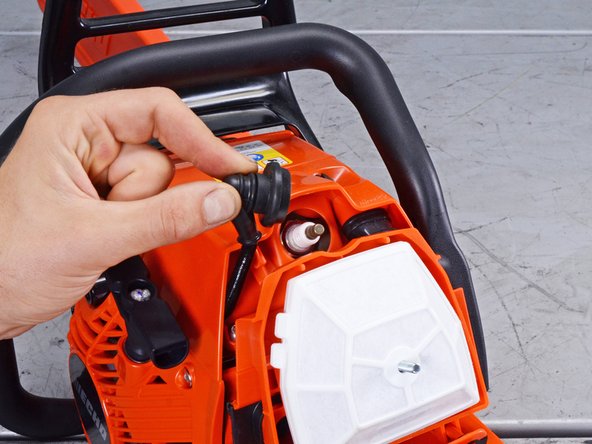
Пальцами потяните вверх и отсоедините свечной башмак.

Шаг 5 Снимите воздушный фильтр

Echo Chain Saw CS590 2019 Ignition Assembly Replacement, Remove the air filter: step 5, image 1 of 3Echo Chain Saw CS590 2019 Ignition Assembly Replacement, Remove the air filter: step 5, image 2 of 3Echo Chain Saw CS590 2019 Ignition Assembly Replacement, Remove the air filter: step 5, image 3 of 3

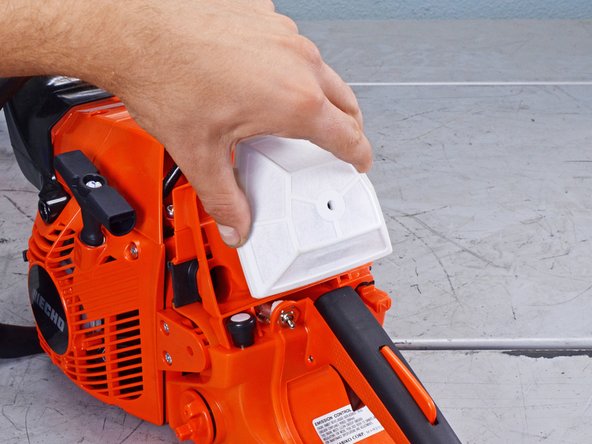
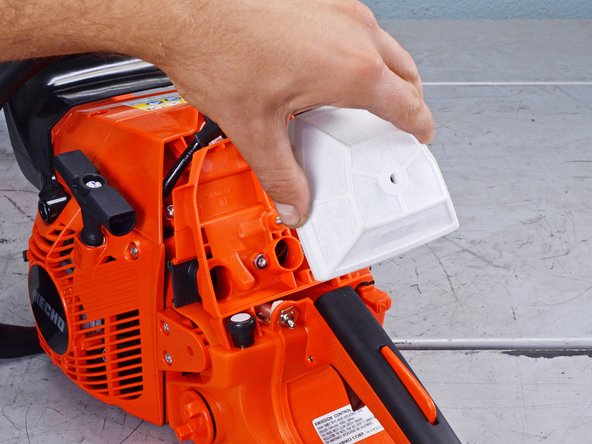
Чтобы свести к минимуму попадание мусора во впускной тракт, перед продолжением работы закройте дроссельную заслонку.

Снимите воздушный фильтр

При сборке очистите воздушный фильтр сжатым воздухом или легкой щеткой, прежде чем устанавливать его на место.

Шаг 6 Отстегните переднюю рукоятку

Echo Chain Saw CS590 2019 Ignition Assembly Replacement, Unfasten the front handle: step 6, image 1 of 2Echo Chain Saw CS590 2019 Ignition Assembly Replacement, Unfasten the front handle: step 6, image 2 of 2

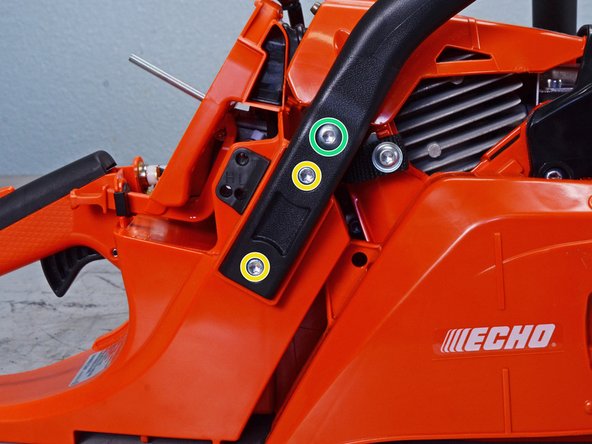
С помощью отвертки T25 Torx открутите пять винтов, крепящих переднюю ручку к нижней и правой стороне устройства:

Четыре винта длиной 24 мм

Один винт длиной 25 мм

Шаг 7 Снимите переднюю ручку

Echo Chain Saw CS590 2019 Ignition Assembly Replacement, Remove the front handle: step 7, image 1 of 3Echo Chain Saw CS590 2019 Ignition Assembly Replacement, Remove the front handle: step 7, image 2 of 3Echo Chain Saw CS590 2019 Ignition Assembly Replacement, Remove the front handle: step 7, image 3 of 3

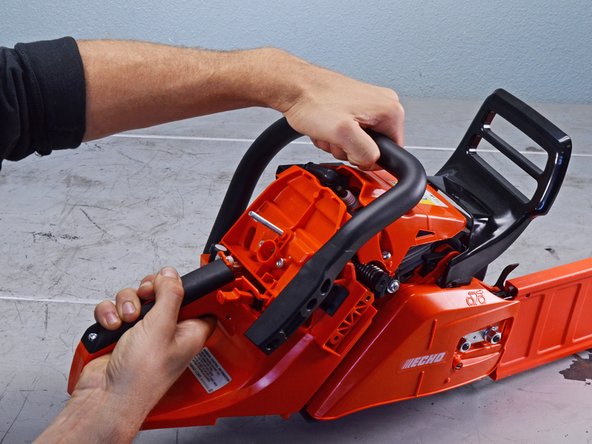
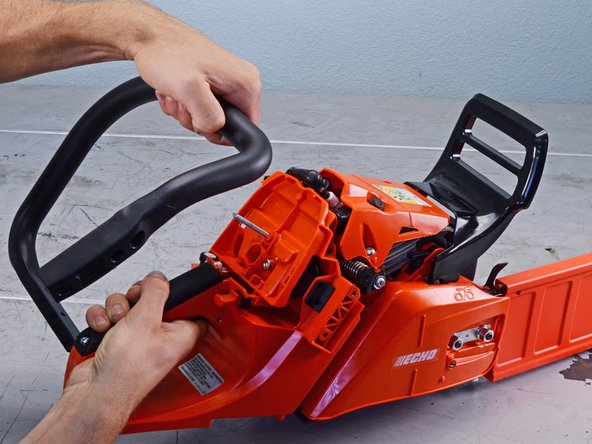
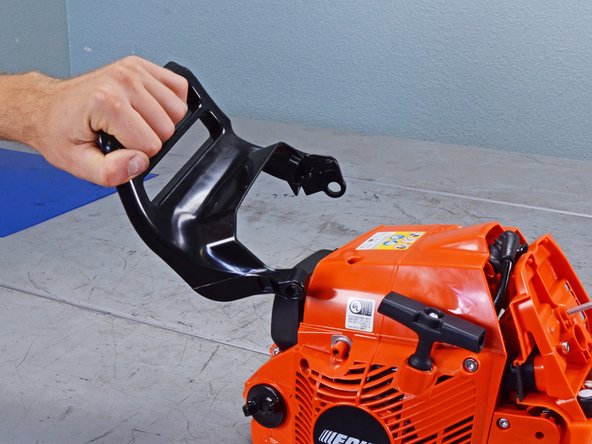
Потяните ручку к задней части устройства, чтобы снять ее.

Шаг 8 Снимите защитный кожух звездочки

Echo Chain Saw CS590 2019 Ignition Assembly Replacement, Remove the sprocket guard: step 8, image 1 of 2Echo Chain Saw CS590 2019 Ignition Assembly Replacement, Remove the sprocket guard: step 8, image 2 of 2

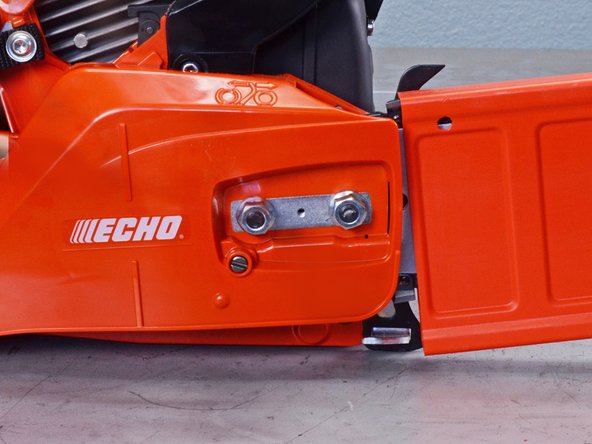
С помощью ключа на 13 мм открутите две гайки, крепящие кожух звездочки.

Шаг 9

Echo Chain Saw CS590 2019 Ignition Assembly Replacement: step 9, image 1 of 3Echo Chain Saw CS590 2019 Ignition Assembly Replacement: step 9, image 2 of 3Echo Chain Saw CS590 2019 Ignition Assembly Replacement: step 9, image 3 of 3

Снимите защитный кожух звездочки.

Шаг 10 Снимите направляющую планку

Echo Chain Saw CS590 2019 Ignition Assembly Replacement, Remove the guide bar: step 10, image 1 of 3Echo Chain Saw CS590 2019 Ignition Assembly Replacement, Remove the guide bar: step 10, image 2 of 3Echo Chain Saw CS590 2019 Ignition Assembly Replacement, Remove the guide bar: step 10, image 3 of 3

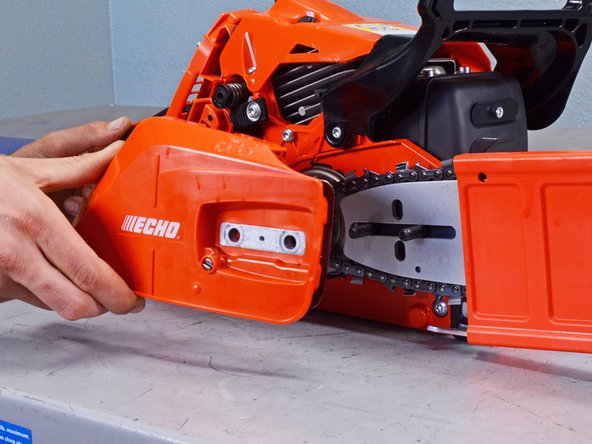
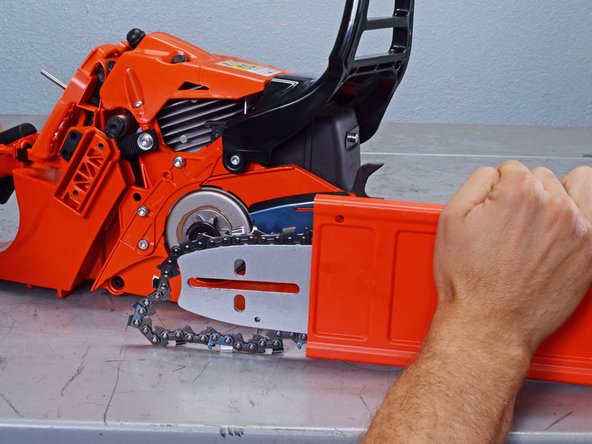
Сдвиньте направляющую шину к задней части устройства, чтобы создать слабину в пильной цепи.

Потяните направляющую шину в сторону от устройства, чтобы отделить пильную цепь от барабана сцепления.

Снимите направляющую шину.

Шаг 11 Отстегните передний кожух для рук

Echo Chain Saw CS590 2019 Ignition Assembly Replacement, Unfasten the front hand guard: step 11, image 1 of 2Echo Chain Saw CS590 2019 Ignition Assembly Replacement, Unfasten the front hand guard: step 11, image 2 of 2

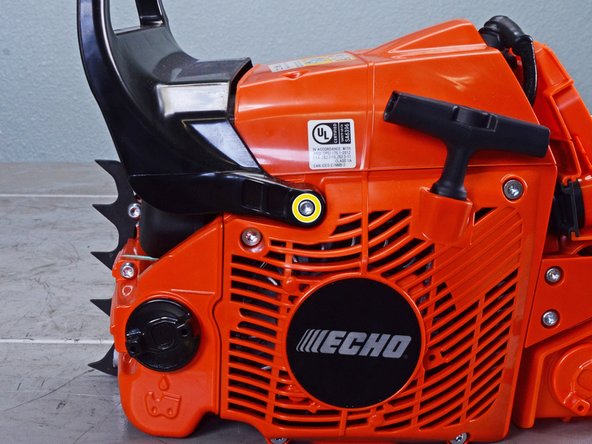
Прежде чем продолжить работу, убедитесь, что передний защитный кожух находится в разблокированном положении.

С помощью отвертки T25 Torx выверните два 20-миллиметровых винта, крепящих передний кожух.

Шаг 12 Снимите передний защитный кожух

Echo Chain Saw CS590 2019 Ignition Assembly Replacement, Remove the front hand guard: step 12, image 1 of 2Echo Chain Saw CS590 2019 Ignition Assembly Replacement, Remove the front hand guard: step 12, image 2 of 2

Потяните передний защитный кожух в сторону задней части устройства, чтобы снять его.

Шаг 13 Открутите крышку двигателя

Echo Chain Saw CS590 2019 Ignition Assembly Replacement, Unfasten the engine cover: step 13, image 1 of 2Echo Chain Saw CS590 2019 Ignition Assembly Replacement, Unfasten the engine cover: step 13, image 2 of 2

С помощью отвертки T25 Torx выверните три винта диаметром 20 мм, крепящих крышку двигателя.

Шаг 14 Снимите крышку двигателя

Echo Chain Saw CS590 2019 Ignition Assembly Replacement, Remove the engine cover: step 14, image 1 of 3Echo Chain Saw CS590 2019 Ignition Assembly Replacement, Remove the engine cover: step 14, image 2 of 3Echo Chain Saw CS590 2019 Ignition Assembly Replacement, Remove the engine cover: step 14, image 3 of 3

Потяните крышку двигателя прямо с устройства, чтобы снять ее.

Шаг 15 Открутите корпус стартера

Echo Chain Saw CS590 2019 Ignition Assembly Replacement, Unfasten the starter case: step 15, image 1 of 2Echo Chain Saw CS590 2019 Ignition Assembly Replacement, Unfasten the starter case: step 15, image 2 of 2

С помощью отвертки T25 Torx выверните четыре винта диаметром 24 мм, крепящих корпус стартера.

Шаг 16

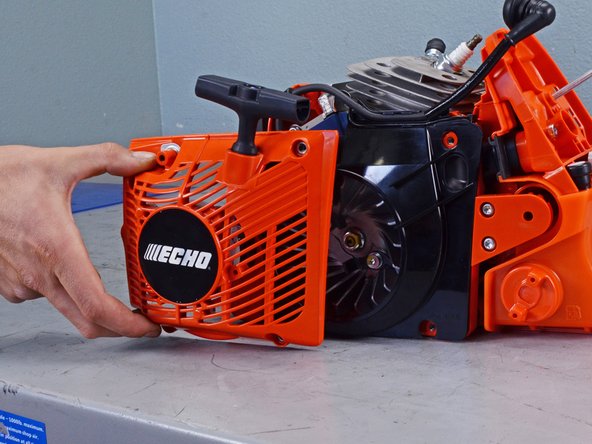
Echo Chain Saw CS590 2019 Ignition Assembly Replacement: step 16, image 1 of 3Echo Chain Saw CS590 2019 Ignition Assembly Replacement: step 16, image 2 of 3Echo Chain Saw CS590 2019 Ignition Assembly Replacement: step 16, image 3 of 3

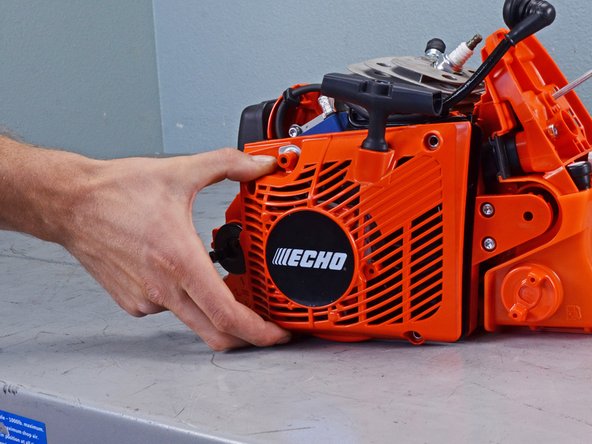
Снимите корпус стартера.

Шаг 17 Измените положение кабеля свечи зажигания

Echo Chain Saw CS590 2019 Ignition Assembly Replacement, Reposition the spark plug cable: step 17, image 1 of 3Echo Chain Saw CS590 2019 Ignition Assembly Replacement, Reposition the spark plug cable: step 17, image 2 of 3Echo Chain Saw CS590 2019 Ignition Assembly Replacement, Reposition the spark plug cable: step 17, image 3 of 3

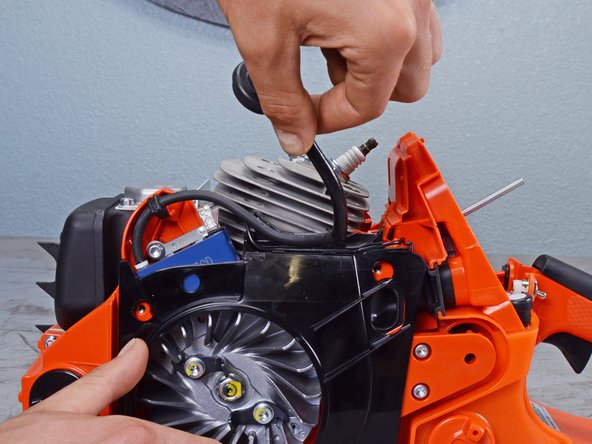
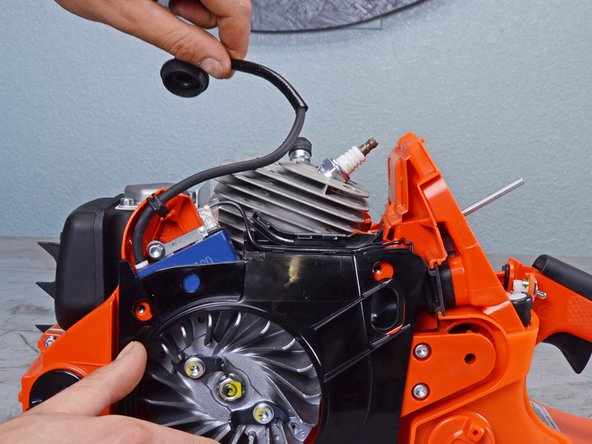
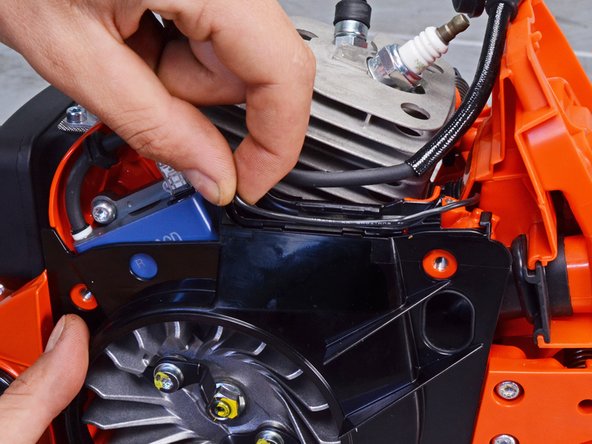
Пальцами выведите кабель свечи зажигания из гнезда в кожухе вентилятора.

Шаг 18 Переставьте кабель катушки зажигания

Echo Chain Saw CS590 2019 Ignition Assembly Replacement, Reposition the ignition coil cable: step 18, image 1 of 3Echo Chain Saw CS590 2019 Ignition Assembly Replacement, Reposition the ignition coil cable: step 18, image 2 of 3Echo Chain Saw CS590 2019 Ignition Assembly Replacement, Reposition the ignition coil cable: step 18, image 3 of 3

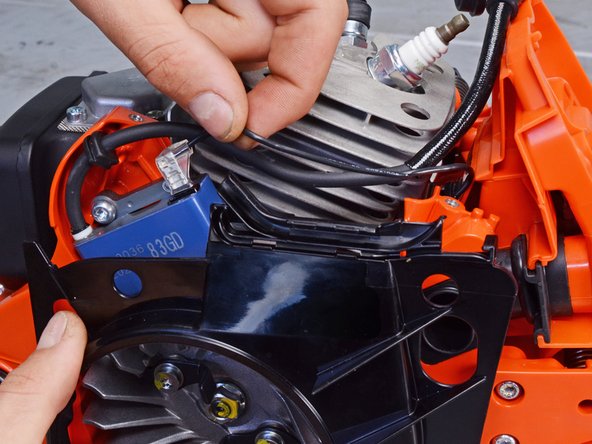
Пальцами выведите кабель катушки зажигания из гнезда в кожухе вентилятора.

Шаг 19 Отсоедините катушку зажигания

Echo Chain Saw CS590 2019 Ignition Assembly Replacement, Disconnect the ignition coil: step 19, image 1 of 2Echo Chain Saw CS590 2019 Ignition Assembly Replacement, Disconnect the ignition coil: step 19, image 2 of 2

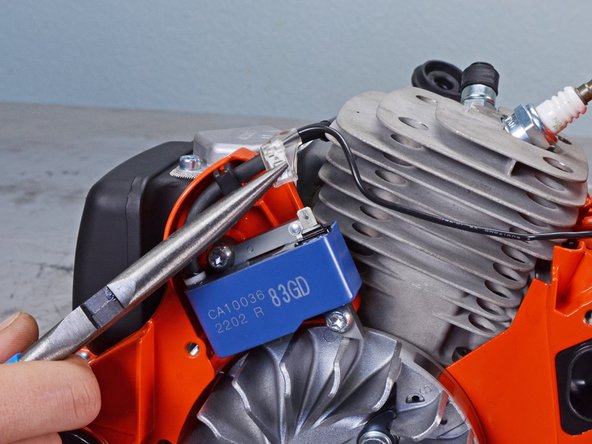
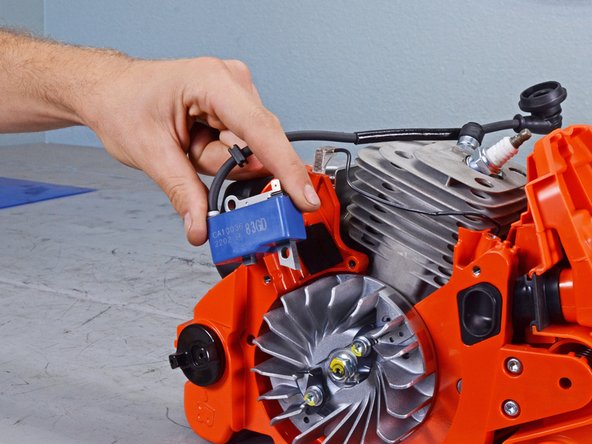
С помощью плоскогубцев или пальцев отсоедините пикообразный разъем кабеля катушки зажигания.

Возьмите разъем за основание прозрачной головки, а не за сам провод.

Шаг 20 Открепите катушку зажигания

Echo Chain Saw CS590 2019 Ignition Assembly Replacement, Unfasten the ignition coil: step 20, image 1 of 2Echo Chain Saw CS590 2019 Ignition Assembly Replacement, Unfasten the ignition coil: step 20, image 2 of 2

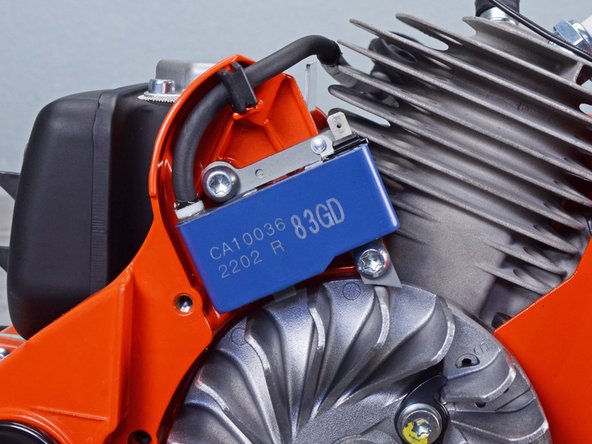
С помощью отвертки T25 Torx открутите два 20-миллиметровых винта, крепящих катушку зажигания.

При сборке вставьте измеритель воздушного зазора зажигания, чтобы обеспечить зазор 0,35 мм между катушкой и магнитом.

Шаг 21 Снимите катушку зажигания

Echo Chain Saw CS590 2019 Ignition Assembly Replacement, Remove the ignition coil: step 21, image 1 of 2Echo Chain Saw CS590 2019 Ignition Assembly Replacement, Remove the ignition coil: step 21, image 2 of 2

Снимите катушку зажигания.

Шаг 22 Снимите гайку фланца

Echo Chain Saw CS590 2019 Ignition Assembly Replacement, Remove the flange nut: step 22, image 1 of 2Echo Chain Saw CS590 2019 Ignition Assembly Replacement, Remove the flange nut: step 22, image 2 of 2

Вставьте плоскую отвертку между шасси и спицами маховика, чтобы предотвратить прокручивание маховика.

В качестве альтернативы можно заблокировать поршень, вставив веревку в вал свечи зажигания.

С помощью ключа на 13 мм ослабьте и снимите фланцевую гайку, расположенную в центре маховика.

Шаг 23 Открутите щеколды стартера

Echo Chain Saw CS590 2019 Ignition Assembly Replacement, Unfasten the starter pawls: step 23, image 1 of 2Echo Chain Saw CS590 2019 Ignition Assembly Replacement, Unfasten the starter pawls: step 23, image 2 of 2

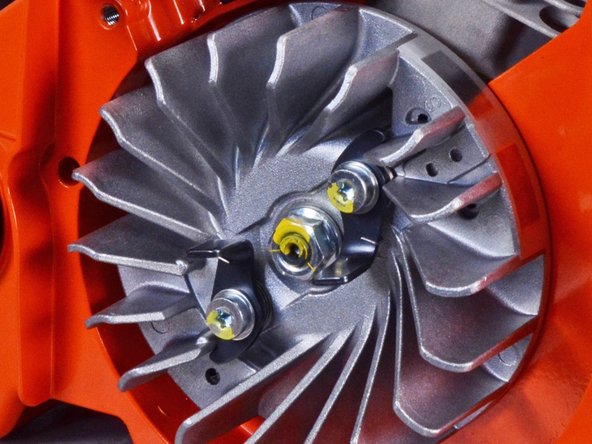
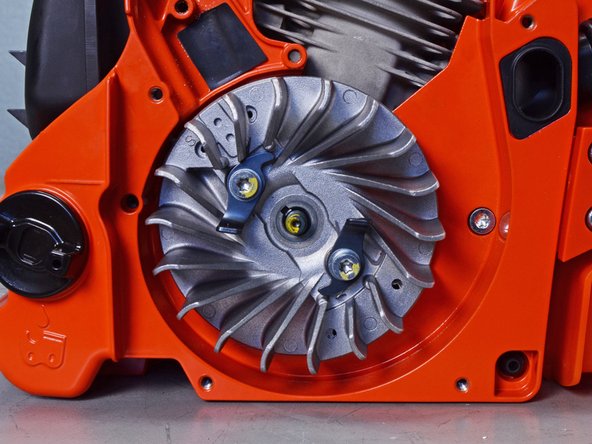
С помощью отвертки T25 Torx выверните два винта диаметром 16 мм, крепящих щеколды стартера.

Снимите щеколды стартера.

Шаг 24 Информация о сборке щеколды стартера

Echo Chain Saw CS590 2019 Ignition Assembly Replacement, Starter pawl assembly information: step 24, image 1 of 2Echo Chain Saw CS590 2019 Ignition Assembly Replacement, Starter pawl assembly information: step 24, image 2 of 2

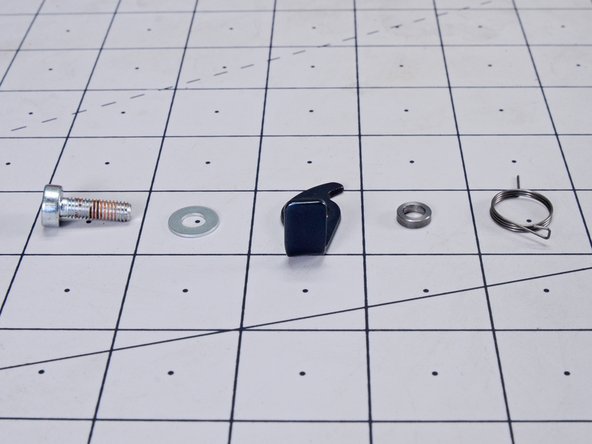
При сборке обязательно установите узел щеколды стартера сверху вниз в следующем порядке:

16 мм винт

Шайба

Щётка стартера

Прокладка

Торсионная пружина

Шаг 25 Снимите маховик

Echo Chain Saw CS590 2019 Ignition Assembly Replacement, Unfasten the flywheel: step 25, image 1 of 2Echo Chain Saw CS590 2019 Ignition Assembly Replacement, Unfasten the flywheel: step 25, image 2 of 2

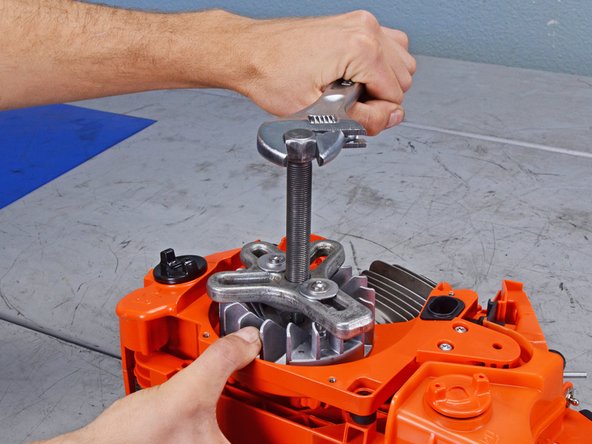
Используйте съемник маховика, чтобы отсоединить маховик от шпонки woodruff.

Шаг 26 Снимите маховик

Echo Chain Saw CS590 2019 Ignition Assembly Replacement, Remove the flywheel: step 26, image 1 of 3Echo Chain Saw CS590 2019 Ignition Assembly Replacement, Remove the flywheel: step 26, image 2 of 3Echo Chain Saw CS590 2019 Ignition Assembly Replacement, Remove the flywheel: step 26, image 3 of 3

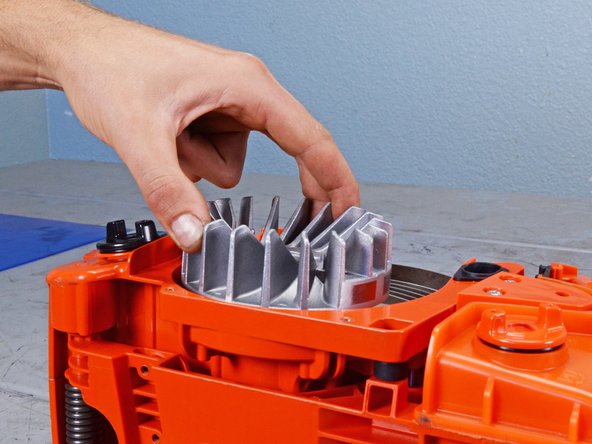
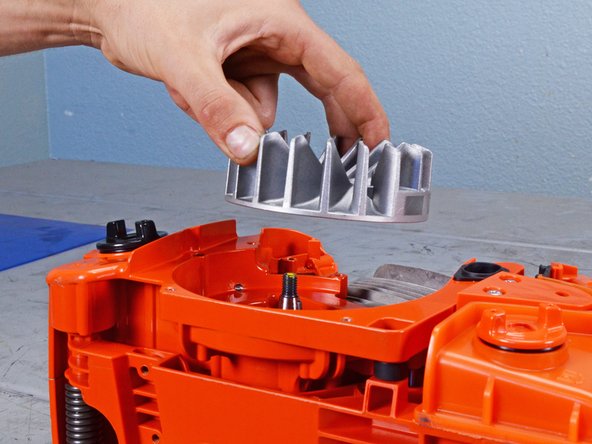
Стяните маховик с коленчатого вала и снимите его.

Шаг 27 Снимите шпонку

Echo Chain Saw CS590 2019 Ignition Assembly Replacement, Remove the woodruff key: step 27, image 1 of 2Echo Chain Saw CS590 2019 Ignition Assembly Replacement, Remove the woodruff key: step 27, image 2 of 2

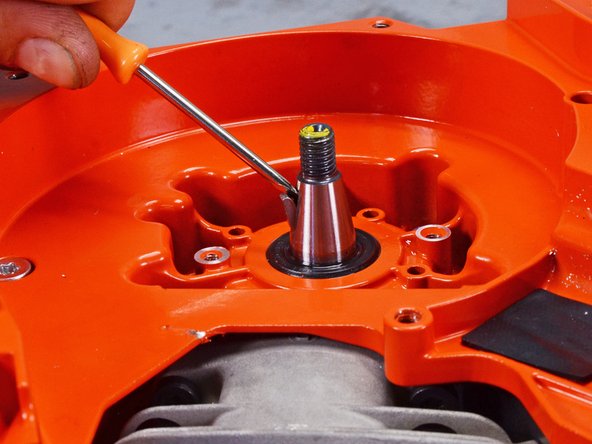
Вставьте плоскую отвертку в зазор в верхней части шпонки.

Подденьте отверткой, чтобы отделить шпонку от коленчатого вала.

Шаг 28

Echo Chain Saw CS590 2019 Ignition Assembly Replacement: step 28, image 1 of 1

С помощью плоскогубцев или пальцев извлеките шпонку.

При сборке не забудьте вставить шпонку с плоской стороной наружу.

Комментировать
84 просмотров
Комментариев нет, будьте первым кто его оставит

Это интересно
No Image Гайды
0 комментариев
No Image Гайды
0 комментариев
No Image Гайды
0 комментариев