No Image

Замена правого бампера Backbone One

71 просмотров
10 декабря 2023

Введение

Используйте это руководство для замены правого бампера в вашем Backbone One.

Шаг 1 Открутите винты

Backbone One Right Bumper Replacement, Remove the screws: step 1, image 1 of 1

С помощью крестообразной отвертки выкрутите четыре винта длиной 5,9 мм.

Шаг 2 Поверните верхнюю часть

Backbone One Right Bumper Replacement, Rotate the upper part: step 2, image 1 of 3Backbone One Right Bumper Replacement, Rotate the upper part: step 2, image 2 of 3Backbone One Right Bumper Replacement, Rotate the upper part: step 2, image 3 of 3

Поднимите верхнюю крышку контроллера.

Поверните верхнюю крышку и положите ее на корпус контроллера.

Убедитесь, что соединительный кабель не натянут.

Шаг 3 Снимите защитную пленку

Backbone One Right Bumper Replacement, Remove the protective tape: step 3, image 1 of 3Backbone One Right Bumper Replacement, Remove the protective tape: step 3, image 2 of 3Backbone One Right Bumper Replacement, Remove the protective tape: step 3, image 3 of 3

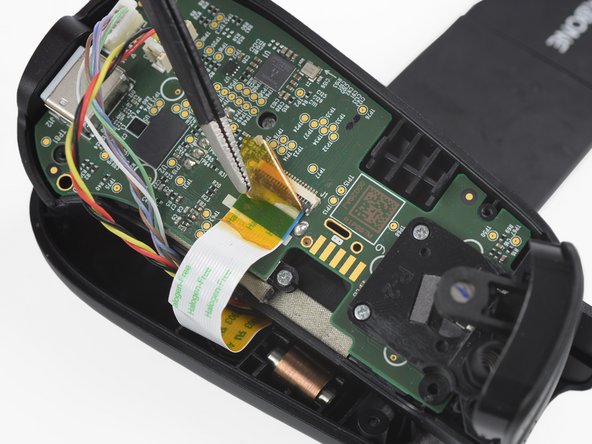
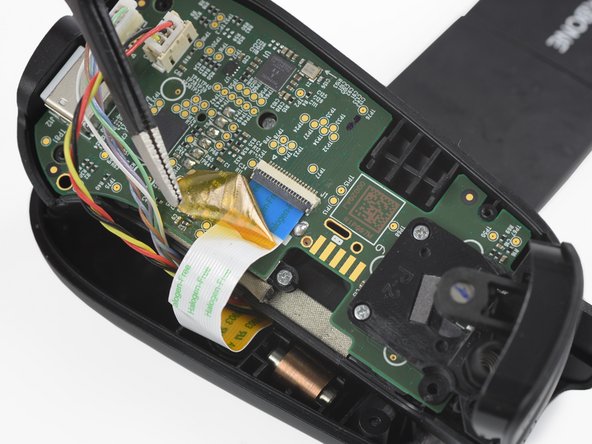
С помощью пинцета снимите желтую защитную ленту, которая наклеена на соединительный кабель и разъем.

Шаг 4 Откройте разъем ZIF соединительного кабеля

Backbone One Right Bumper Replacement, Open the interconnect cable ZIF connector: step 4, image 1 of 3Backbone One Right Bumper Replacement, Open the interconnect cable ZIF connector: step 4, image 2 of 3Backbone One Right Bumper Replacement, Open the interconnect cable ZIF connector: step 4, image 3 of 3

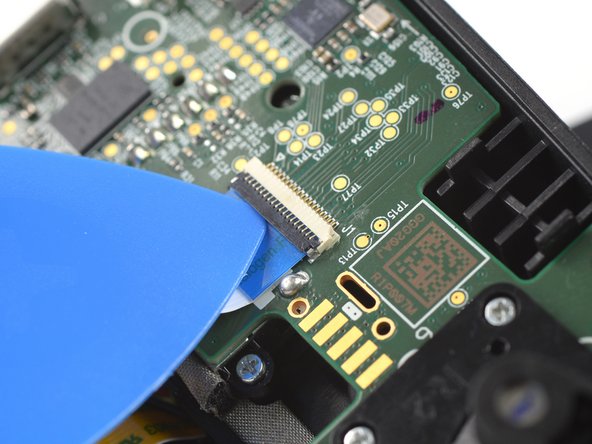
С помощью кончика медиатора откройте серую крышку разъема ZIF межблочного кабеля, надавив на нее вверх.

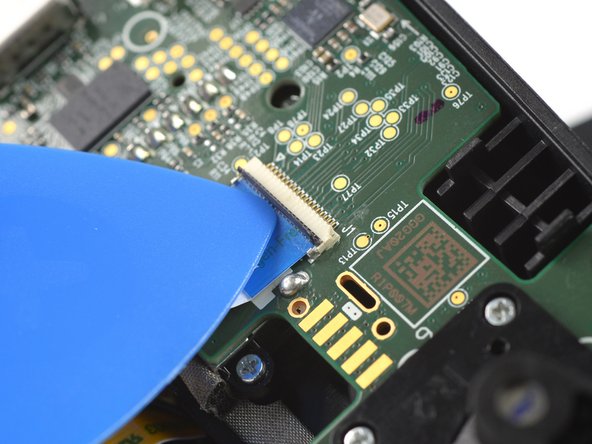
Шаг 5 Отсоедините межблочный кабель

Backbone One Right Bumper Replacement, Disconnect the interconnect cable: step 5, image 1 of 2Backbone One Right Bumper Replacement, Disconnect the interconnect cable: step 5, image 2 of 2

Отсоедините кабель, потянув его прямо из разъема ZIF.

Шаг 6 Отсоедините кабели телефонного разъема

Backbone One Right Bumper Replacement, Disconnect the phone connector cables: step 6, image 1 of 3Backbone One Right Bumper Replacement, Disconnect the phone connector cables: step 6, image 2 of 3Backbone One Right Bumper Replacement, Disconnect the phone connector cables: step 6, image 3 of 3

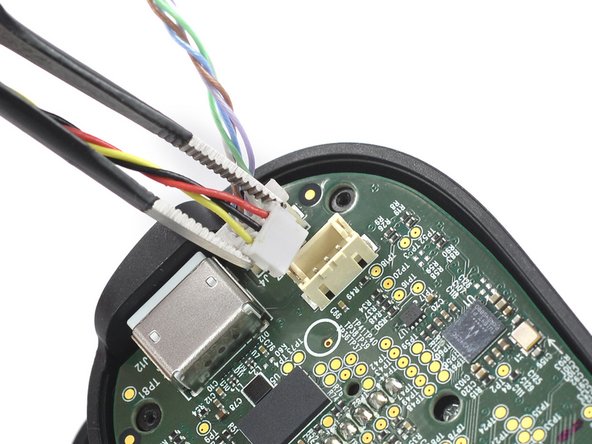
С помощью пинцета отсоедините кабели телефонных разъемов от гнезд.

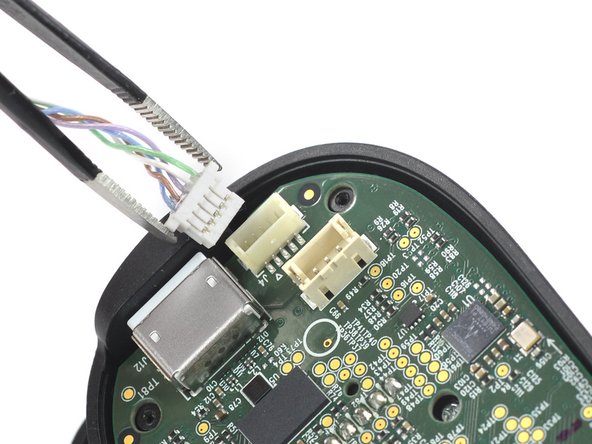
Шаг 7 Отделите верхний корпус

Backbone One Right Bumper Replacement, Separate the upper case: step 7, image 1 of 1

Отделите верхний корпус левой ручки контроллера.

Шаг 8 Открутите винты

Backbone One Right Bumper Replacement, Remove the screws: step 8, image 1 of 1

С помощью крестообразной отвертки открутите три винта длиной 5,9 мм.
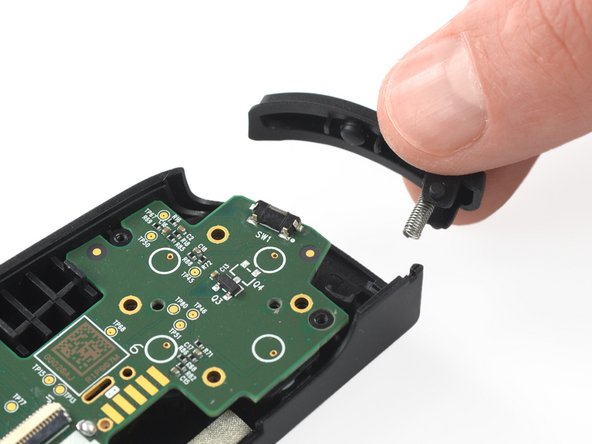
Шаг 9 Снимите курок

Backbone One Right Bumper Replacement, Remove the trigger: step 9, image 1 of 2Backbone One Right Bumper Replacement, Remove the trigger: step 9, image 2 of 2

Снимите курок.

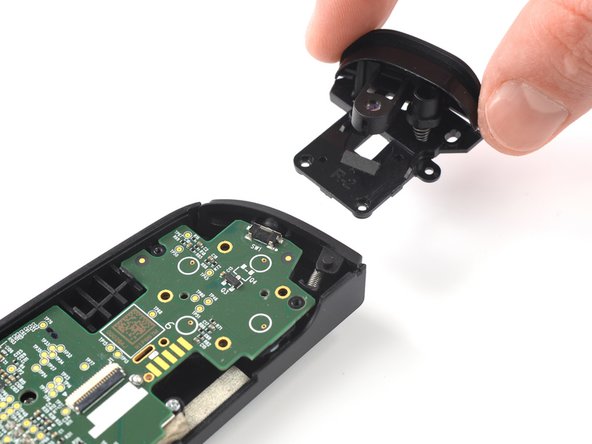
Шаг 10 Снимите бампер

Backbone One Right Bumper Replacement, Remove the bumper: step 10, image 1 of 2Backbone One Right Bumper Replacement, Remove the bumper: step 10, image 2 of 2

Снимите бампер.

Комментировать
71 просмотров
Комментариев нет, будьте первым кто его оставит

Это интересно
No Image Гайды
0 комментариев
No Image Гайды
0 комментариев
No Image Гайды
0 комментариев