No Image

Замена якоря Dremel MultiPro 395

62 просмотров
17 декабря 2023

Введение

В этом руководстве показано, как заменить неисправный якорь в Dremel MultiPro 395.

Шаг 1 Снимите синие колпачки

Dremel MultiPro 395 Armature Replacement, Remove the Blue caps: step 1, image 1 of 2Dremel MultiPro 395 Armature Replacement, Remove the Blue caps: step 1, image 2 of 2

Снимите синие крышки, расположенные с обеих сторон MultiPro, с помощью плоской отвертки диаметром 3 мм.

Шаг 2 Снимите угольные щетки

Dremel MultiPro 395 Armature Replacement, Remove the carbon brushes: step 2, image 1 of 2Dremel MultiPro 395 Armature Replacement, Remove the carbon brushes: step 2, image 2 of 2

Осторожно снимите угольные щетки, закрепленные на концах пружин, аккуратно потянув за пружины руками.

Шаг 3 Снятие вешалки

Dremel MultiPro 395 Armature Replacement, Removing the Hanger: step 3, image 1 of 2Dremel MultiPro 395 Armature Replacement, Removing the Hanger: step 3, image 2 of 2

Потяните одну сторону вешалки вверх, а затем потяните в сторону от Multipro, чтобы вытащить другую сторону.

Шаг 4 Открутите винты в корпусе

Dremel MultiPro 395 Armature Replacement, Remove the screws in the casing: step 4, image 1 of 3Dremel MultiPro 395 Armature Replacement, Remove the screws in the casing: step 4, image 2 of 3Dremel MultiPro 395 Armature Replacement, Remove the screws in the casing: step 4, image 3 of 3

Отверткой T15 выкрутите 4 винта, расположенные на нижней части Multipro.

Шаг 5 Снятие крышки патрона

Dremel MultiPro 395 Armature Replacement, Removing the chuck cap: step 5, image 1 of 3Dremel MultiPro 395 Armature Replacement, Removing the chuck cap: step 5, image 2 of 3Dremel MultiPro 395 Armature Replacement, Removing the chuck cap: step 5, image 3 of 3

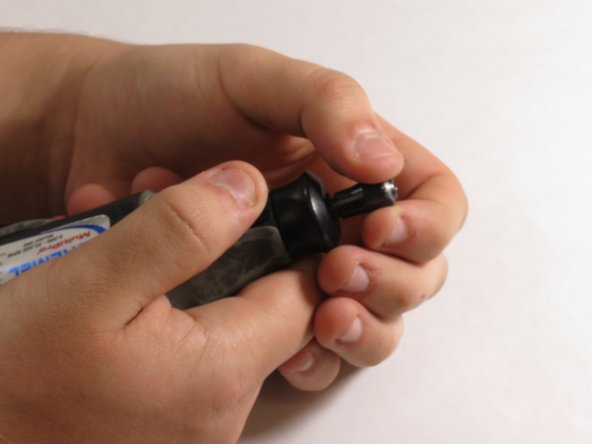
Удерживая цанговый фиксатор, снимите крышку патрона с верхней части Multipro, открутив ее против часовой стрелки.

Шаг 6 Снятие черной крышки корпуса

Dremel MultiPro 395 Armature Replacement, Removing the black housing cap: step 6, image 1 of 3Dremel MultiPro 395 Armature Replacement, Removing the black housing cap: step 6, image 2 of 3Dremel MultiPro 395 Armature Replacement, Removing the black housing cap: step 6, image 3 of 3

Снимите с Multipro черную крышку корпуса, расположенную непосредственно под крышкой патрона.

Шаг 7 Снятие внешнего корпуса

Dremel MultiPro 395 Armature Replacement, Removing the outer casing: step 7, image 1 of 3Dremel MultiPro 395 Armature Replacement, Removing the outer casing: step 7, image 2 of 3Dremel MultiPro 395 Armature Replacement, Removing the outer casing: step 7, image 3 of 3

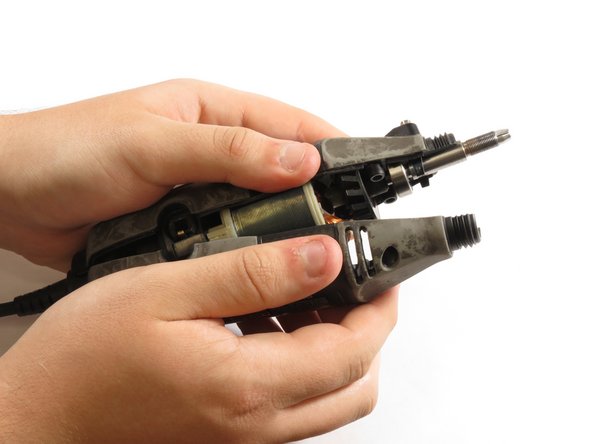
Потяните нижнюю сторону корпуса вверх, чтобы снять его.

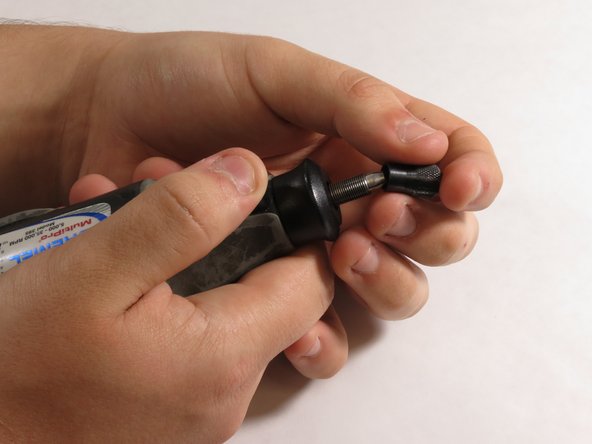
Шаг 8 Снятие вала двигателя

Dremel MultiPro 395 Armature Replacement, Removing the motorshaft: step 8, image 1 of 3Dremel MultiPro 395 Armature Replacement, Removing the motorshaft: step 8, image 2 of 3Dremel MultiPro 395 Armature Replacement, Removing the motorshaft: step 8, image 3 of 3

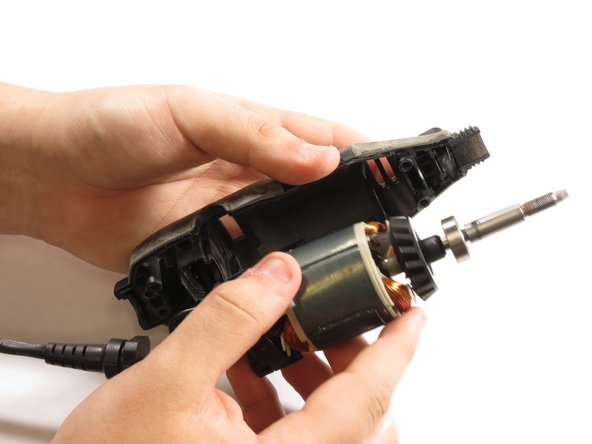
Аккуратно извлеките вал двигателя из Multipro.

Шаг 9 Снятие резинового кольца

Dremel MultiPro 395 Armature Replacement, Removing the rubber ring: step 9, image 1 of 3Dremel MultiPro 395 Armature Replacement, Removing the rubber ring: step 9, image 2 of 3Dremel MultiPro 395 Armature Replacement, Removing the rubber ring: step 9, image 3 of 3

Снимите резиновое кольцо с нижней части якоря.

Шаг 10 Снятие выключателя включения/выключения

Dremel MultiPro 395 Armature Replacement, Removing the on/off switch: step 10, image 1 of 3Dremel MultiPro 395 Armature Replacement, Removing the on/off switch: step 10, image 2 of 3Dremel MultiPro 395 Armature Replacement, Removing the on/off switch: step 10, image 3 of 3

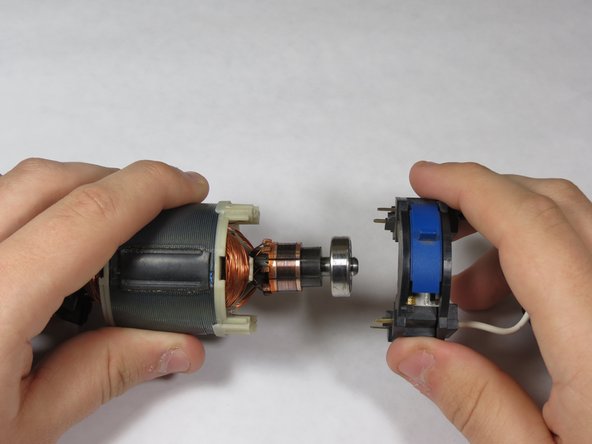
Снимите выключатель с поля 120 В, обращая внимание на штырьки на выключателе.

При сборке убедитесь, что штырьки касаются металлических разъемов на нижней части поля 120 В.
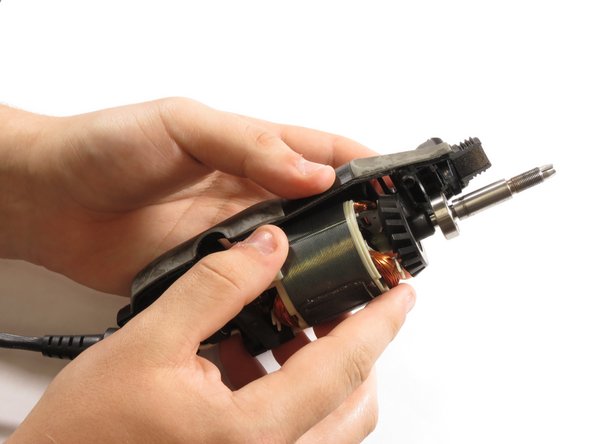
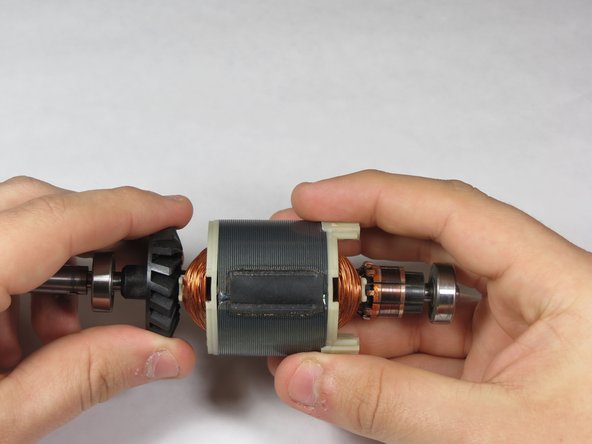
Шаг 11 Снятие якоря

Dremel MultiPro 395 Armature Replacement, Removing the armature: step 11, image 1 of 3Dremel MultiPro 395 Armature Replacement, Removing the armature: step 11, image 2 of 3Dremel MultiPro 395 Armature Replacement, Removing the armature: step 11, image 3 of 3

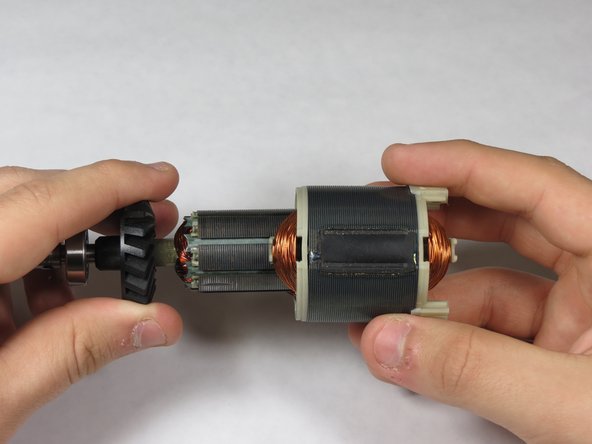
Осторожно выдвиньте якорь из поля 120 В.

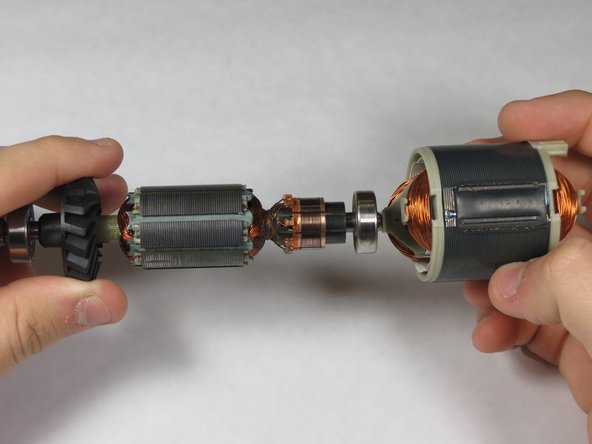
Шаг 12 Установка нового якоря

Dremel MultiPro 395 Armature Replacement, Inserting new armature: step 12, image 1 of 3Dremel MultiPro 395 Armature Replacement, Inserting new armature: step 12, image 2 of 3Dremel MultiPro 395 Armature Replacement, Inserting new armature: step 12, image 3 of 3

Осторожно вставьте новый якорь обратно в поле 120 В.

Комментировать
62 просмотров
Комментариев нет, будьте первым кто его оставит

Это интересно
No Image Гайды
0 комментариев
No Image Гайды
0 комментариев
No Image Гайды
0 комментариев