No Image

Замена экрана и рамки в сборе планшета Lenovo Yoga Tablet 10

СОДЕРЖАНИЕ
57 просмотров
09 декабря 2023

Введение

Прежде чем приступить к выполнению этого руководства, необходимо знать, как паять. Вы можете обратиться к руководству по пайке от iFixit здесь.

Шаг 1 Задняя крышка

Lenovo Yoga Tablet 10 Screen and Frame Assembly Replacement, Back Cover: step 1, image 1 of 1

Выкрутите два винта Phillips #000.

Эти винты расположены за подставкой для устройства.

В комплект нашего устройства эти винты не входили.

Шаг 2

Lenovo Yoga Tablet 10 Screen and Frame Assembly Replacement: step 2, image 1 of 1

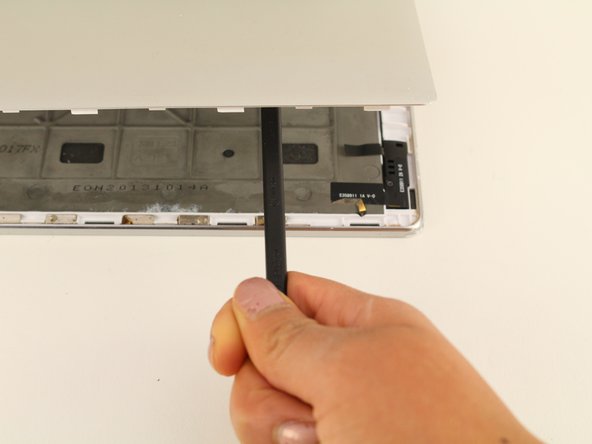
С помощью пластикового инструмента для открывания iFixit подденьте края задней крышки, поместив его между краем крышки и экраном.

Не пытайтесь сразу снять заднюю часть корпуса, не выполнив шаг 3, иначе вы рискуете сломать заднюю крышку.

Шаг 3

Lenovo Yoga Tablet 10 Screen and Frame Assembly Replacement: step 3, image 1 of 2Lenovo Yoga Tablet 10 Screen and Frame Assembly Replacement: step 3, image 2 of 2

С помощью лопатки подденьте устройство и подденьте заднюю крышку, слегка надавив на нее сверху.

Шаг 4 Задняя камера

Lenovo Yoga Tablet 10 Screen and Frame Assembly Replacement, Back Camera: step 4, image 1 of 2Lenovo Yoga Tablet 10 Screen and Frame Assembly Replacement, Back Camera: step 4, image 2 of 2

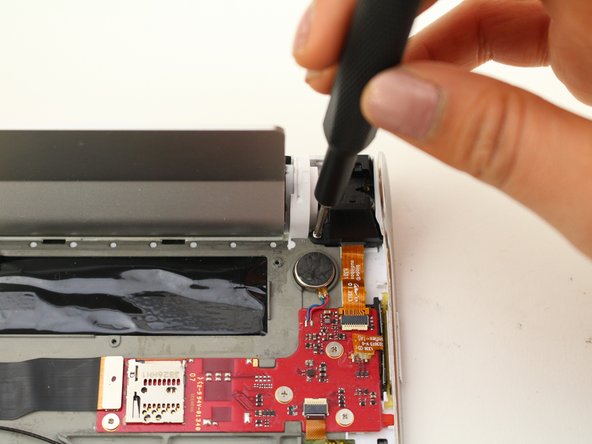
Выкрутите один 5-миллиметровый винт с помощью крестообразной отвертки №00.

Шаг 5

Lenovo Yoga Tablet 10 Screen and Frame Assembly Replacement: step 5, image 1 of 3Lenovo Yoga Tablet 10 Screen and Frame Assembly Replacement: step 5, image 2 of 3Lenovo Yoga Tablet 10 Screen and Frame Assembly Replacement: step 5, image 3 of 3

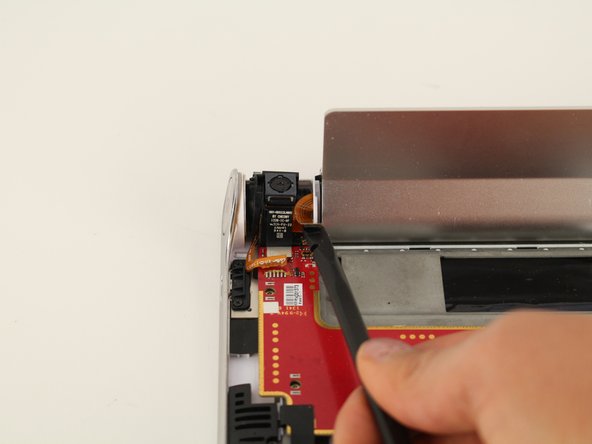
С помощью пробки отсоедините камеру и аккумулятор от печатной платы, поместив пробку между соединениями и печатной платой и подтолкнув ее вверх.

Шаг 6

Lenovo Yoga Tablet 10 Screen and Frame Assembly Replacement: step 6, image 1 of 1

Отверткой Phillips #00 выкрутите один 5-миллиметровый винт.

Шаг 7

Lenovo Yoga Tablet 10 Screen and Frame Assembly Replacement: step 7, image 1 of 3Lenovo Yoga Tablet 10 Screen and Frame Assembly Replacement: step 7, image 2 of 3Lenovo Yoga Tablet 10 Screen and Frame Assembly Replacement: step 7, image 3 of 3

С помощью пинцета с нейлоновым наконечником вытащите камеру из пространства между кнопкой питания и подставкой.

Шаг 8 Разъем для наушников

Lenovo Yoga Tablet 10 Screen and Frame Assembly Replacement, Headphone Jack: step 8, image 1 of 2Lenovo Yoga Tablet 10 Screen and Frame Assembly Replacement, Headphone Jack: step 8, image 2 of 2

Снимите крышку разъема для наушников с помощью пинцета, захватив ее и потянув вверх и в сторону от устройства.

Шаг 9

Lenovo Yoga Tablet 10 Screen and Frame Assembly Replacement: step 9, image 1 of 3Lenovo Yoga Tablet 10 Screen and Frame Assembly Replacement: step 9, image 2 of 3Lenovo Yoga Tablet 10 Screen and Frame Assembly Replacement: step 9, image 3 of 3

Отверткой Phillips #00 открутите два 3,5-мм винта.

Шаг 10

Lenovo Yoga Tablet 10 Screen and Frame Assembly Replacement: step 10, image 1 of 3Lenovo Yoga Tablet 10 Screen and Frame Assembly Replacement: step 10, image 2 of 3Lenovo Yoga Tablet 10 Screen and Frame Assembly Replacement: step 10, image 3 of 3

Отсоедините разъем для наушников от материнской платы, поместив палочку между разъемами и материнской платой и надавив на нее по направлению к себе.

Потяните провод в сторону разъема для наушников, чтобы отсоединить его.

Шаг 11

Lenovo Yoga Tablet 10 Screen and Frame Assembly Replacement: step 11, image 1 of 2Lenovo Yoga Tablet 10 Screen and Frame Assembly Replacement: step 11, image 2 of 2

С помощью пинцета извлеките разъем для наушников, потянув его вверх и к себе.

Шаг 12 Батарея

Lenovo Yoga Tablet 10 Screen and Frame Assembly Replacement, Battery: step 12, image 1 of 2Lenovo Yoga Tablet 10 Screen and Frame Assembly Replacement, Battery: step 12, image 2 of 2

С помощью металлической лопатки вытолкните замок аккумуляторного отсека, поместив металлическую лопатку между подставкой и пластиком и приложив усилие вверх.

Будьте осторожны, так как чрезмерное усилие металлической лопаткой может привести к поломке пластикового покрытия. Если вам кажется, что пластик может сломаться, измените угол, под которым вы используете металлическую лопатку.

Металлическую лопатку можно использовать только с той же стороны, что и разъем для наушников. Использование металлической лопатки с другой стороны не даст никаких результатов.

Шаг 13

Lenovo Yoga Tablet 10 Screen and Frame Assembly Replacement: step 13, image 1 of 2Lenovo Yoga Tablet 10 Screen and Frame Assembly Replacement: step 13, image 2 of 2

Потяните аккумуляторный отсек в сторону от устройства.

Батарейный отсек является подставкой для ног.

Шаг 14

Lenovo Yoga Tablet 10 Screen and Frame Assembly Replacement: step 14, image 1 of 2Lenovo Yoga Tablet 10 Screen and Frame Assembly Replacement: step 14, image 2 of 2

С помощью пинцета снимите серую пленку и откройте винт на каждом конце отсека.

Шаг 15

Lenovo Yoga Tablet 10 Screen and Frame Assembly Replacement: step 15, image 1 of 3Lenovo Yoga Tablet 10 Screen and Frame Assembly Replacement: step 15, image 2 of 3Lenovo Yoga Tablet 10 Screen and Frame Assembly Replacement: step 15, image 3 of 3

Выкрутите по одному винту 3,5 мм с каждого конца, используя отвертку Phillips #00.

Шаг 16

Lenovo Yoga Tablet 10 Screen and Frame Assembly Replacement: step 16, image 1 of 2Lenovo Yoga Tablet 10 Screen and Frame Assembly Replacement: step 16, image 2 of 2

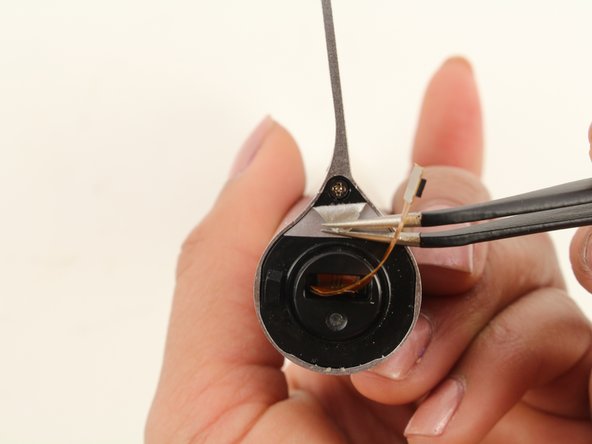
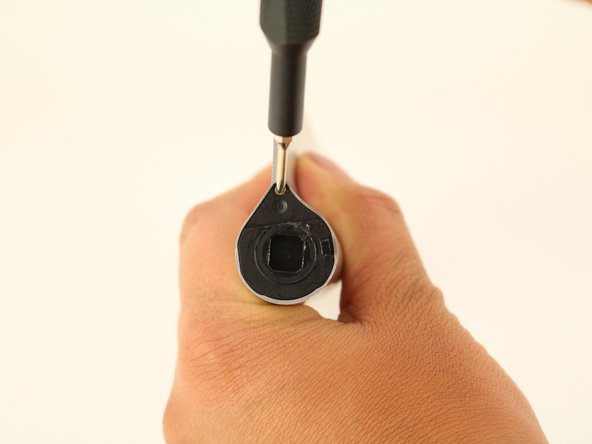
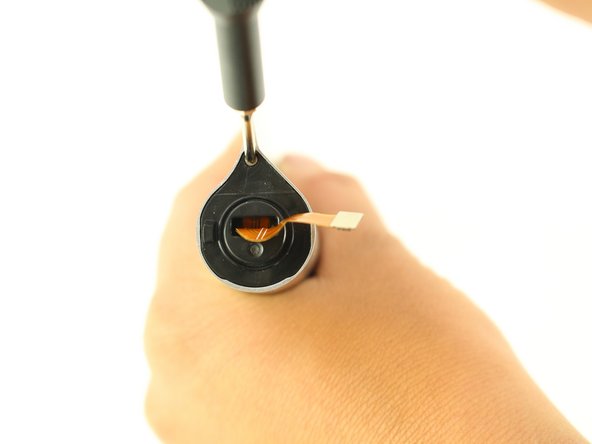
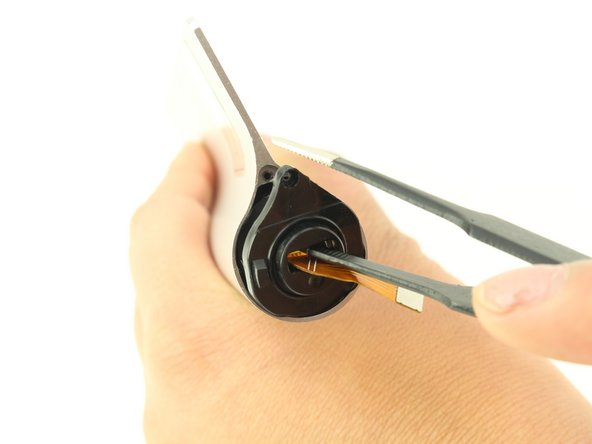
С помощью пинцета снимите колпачок с той стороны, откуда выходит оранжевый разъем.

Вы должны услышать громкий щелчок, когда вставите пинцет в середину колпачка и потянете вверх.

Шаг 17

Lenovo Yoga Tablet 10 Screen and Frame Assembly Replacement: step 17, image 1 of 3Lenovo Yoga Tablet 10 Screen and Frame Assembly Replacement: step 17, image 2 of 3Lenovo Yoga Tablet 10 Screen and Frame Assembly Replacement: step 17, image 3 of 3

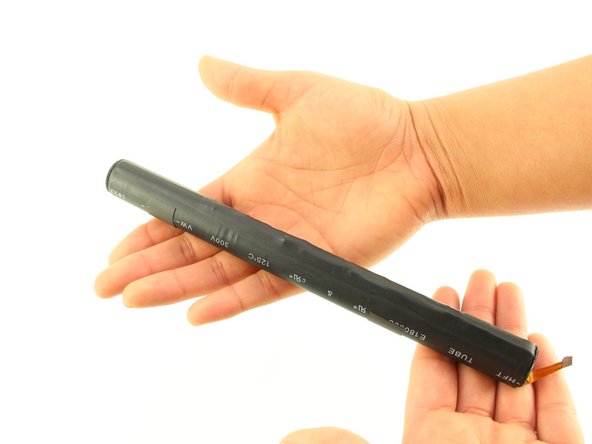
Руками вытолкните аккумулятор на другую сторону отсека.

Не потеряйте крышку с другой стороны отсека.

Шаг 18 Печатная плата камеры

Lenovo Yoga Tablet 10 Screen and Frame Assembly Replacement, Camera PCB: step 18, image 1 of 1

Выкрутите четыре винта диаметром 1 мм с помощью крестовой отвертки №00.

Шаг 19

Lenovo Yoga Tablet 10 Screen and Frame Assembly Replacement: step 19, image 1 of 2Lenovo Yoga Tablet 10 Screen and Frame Assembly Replacement: step 19, image 2 of 2

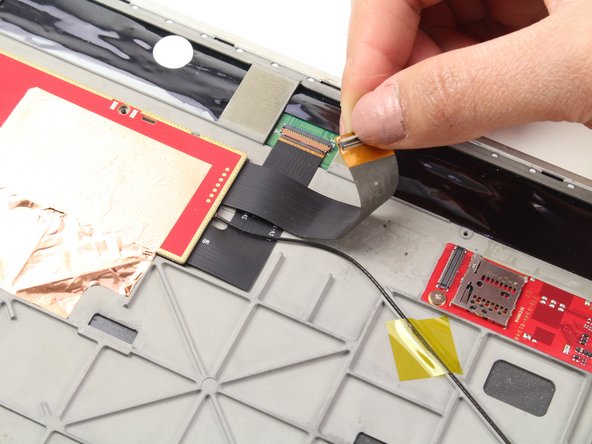
С помощью пассатижей отсоедините ленточный провод, приложив усилие вверх.

Шаг 20
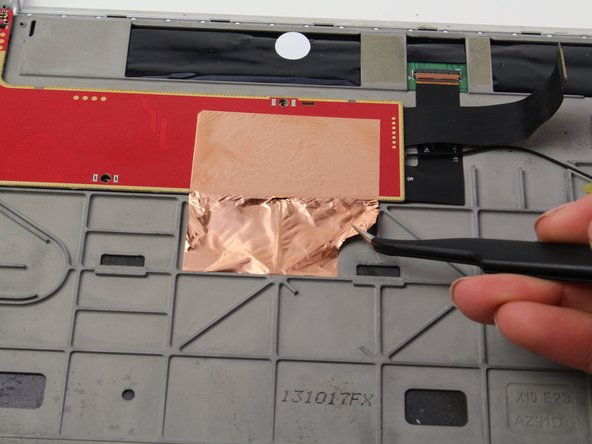
Lenovo Yoga Tablet 10 Screen and Frame Assembly Replacement: step 20, image 1 of 2Lenovo Yoga Tablet 10 Screen and Frame Assembly Replacement: step 20, image 2 of 2

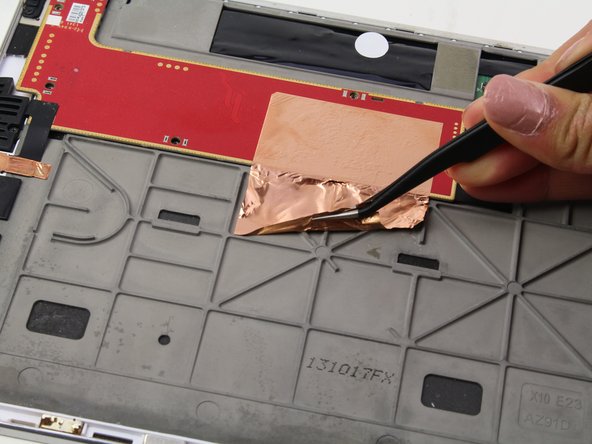
Пинцетом подденьте фольгу.

Фольга может порваться.

Шаг 21

Lenovo Yoga Tablet 10 Screen and Frame Assembly Replacement: step 21, image 1 of 2Lenovo Yoga Tablet 10 Screen and Frame Assembly Replacement: step 21, image 2 of 2

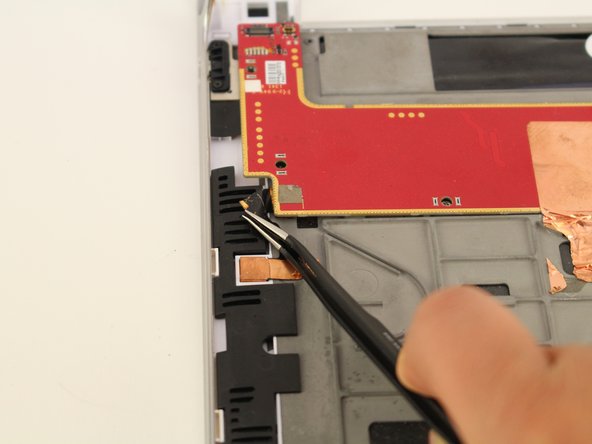
Пинцетом поднимите черную ленту с угла печатной платы.

Шаг 22

Lenovo Yoga Tablet 10 Screen and Frame Assembly Replacement: step 22, image 1 of 3Lenovo Yoga Tablet 10 Screen and Frame Assembly Replacement: step 22, image 2 of 3Lenovo Yoga Tablet 10 Screen and Frame Assembly Replacement: step 22, image 3 of 3

Переверните плату на 180 градусов по направлению к себе, используя пинцет.

Шаг 23 Модуль Wi-Fi

Lenovo Yoga Tablet 10 Screen and Frame Assembly Replacement, Wi-Fi Module: step 23, image 1 of 2Lenovo Yoga Tablet 10 Screen and Frame Assembly Replacement, Wi-Fi Module: step 23, image 2 of 2

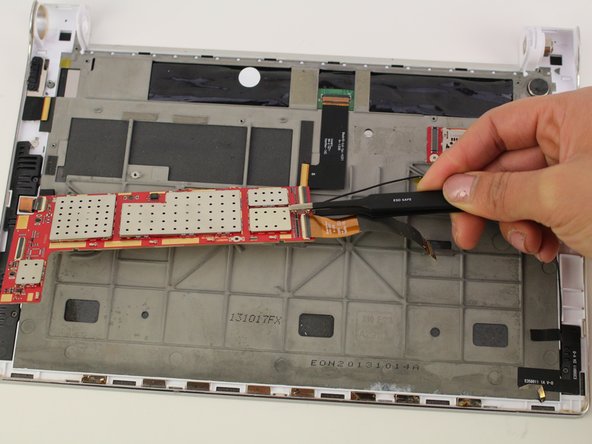
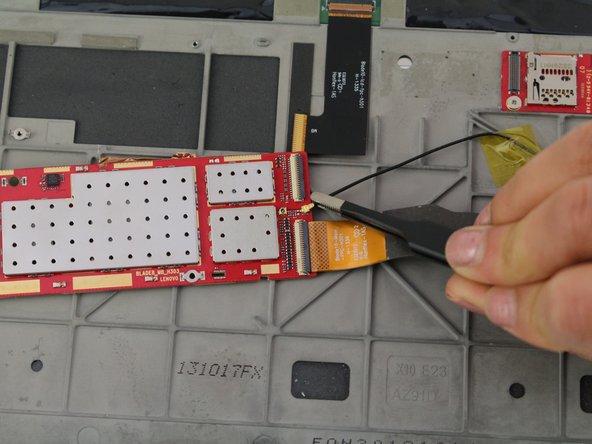
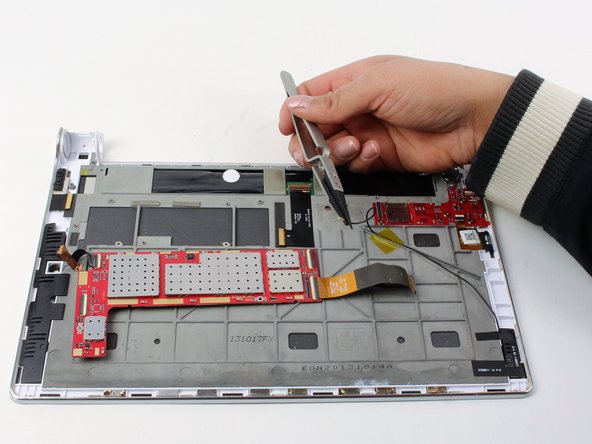
Отсоедините провод от печатной платы, потянув его к краю разъема для наушников с помощью пинцета.

Шаг 24

Lenovo Yoga Tablet 10 Screen and Frame Assembly Replacement: step 24, image 1 of 3Lenovo Yoga Tablet 10 Screen and Frame Assembly Replacement: step 24, image 2 of 3Lenovo Yoga Tablet 10 Screen and Frame Assembly Replacement: step 24, image 3 of 3

Выкрутите один 5-миллиметровый винт, используя крестовую отвертку №00.

Шаг 25

Lenovo Yoga Tablet 10 Screen and Frame Assembly Replacement: step 25, image 1 of 3Lenovo Yoga Tablet 10 Screen and Frame Assembly Replacement: step 25, image 2 of 3Lenovo Yoga Tablet 10 Screen and Frame Assembly Replacement: step 25, image 3 of 3

С помощью пинцета снимите ленту, чтобы отсоединить модуль, потянув его вверх.

Шаг 26

Lenovo Yoga Tablet 10 Screen and Frame Assembly Replacement: step 26, image 1 of 2Lenovo Yoga Tablet 10 Screen and Frame Assembly Replacement: step 26, image 2 of 2

Удалите желтый кусок ленты, потянув его вверх с помощью пинцета.

Шаг 27 Сборка экрана и рамки

Lenovo Yoga Tablet 10 Screen and Frame Assembly Replacement, Screen and Frame Assembly: step 27, image 1 of 3Lenovo Yoga Tablet 10 Screen and Frame Assembly Replacement, Screen and Frame Assembly: step 27, image 2 of 3Lenovo Yoga Tablet 10 Screen and Frame Assembly Replacement, Screen and Frame Assembly: step 27, image 3 of 3

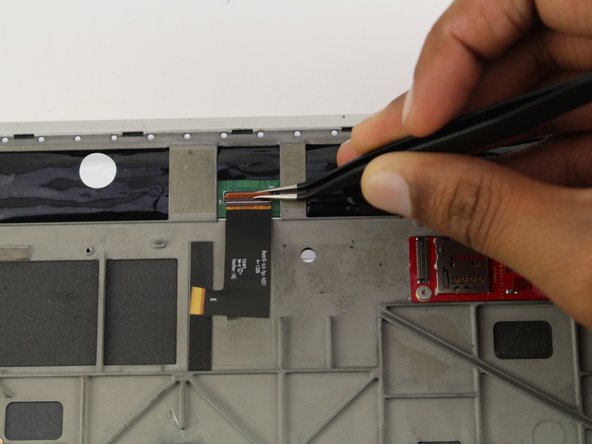
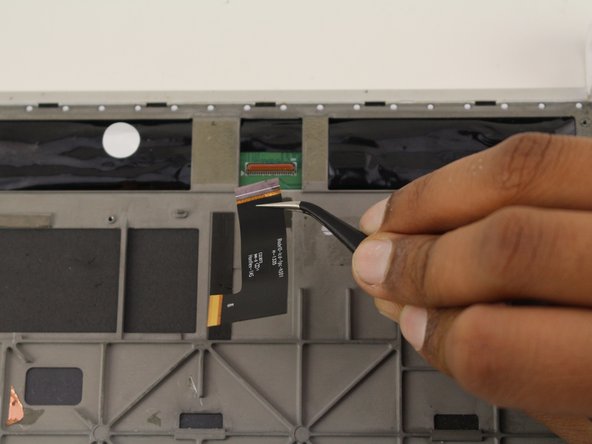
Отделите ленточный провод с помощью пинцета и отсоедините его от материнской платы.

Шаг 28

Lenovo Yoga Tablet 10 Screen and Frame Assembly Replacement: step 28, image 1 of 2Lenovo Yoga Tablet 10 Screen and Frame Assembly Replacement: step 28, image 2 of 2

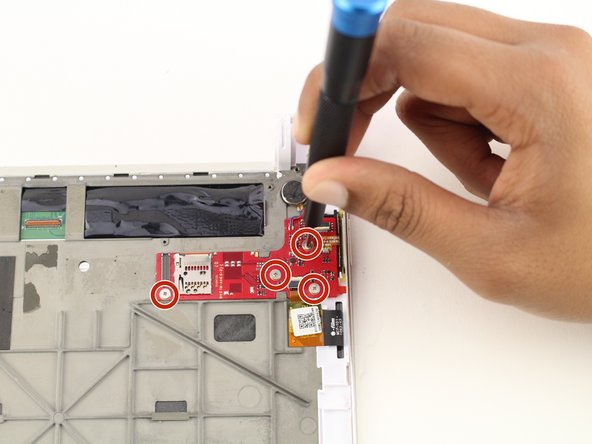
Выкрутите четыре 1-мм винта Phillips #00.

Шаг 29

Lenovo Yoga Tablet 10 Screen and Frame Assembly Replacement: step 29, image 1 of 3Lenovo Yoga Tablet 10 Screen and Frame Assembly Replacement: step 29, image 2 of 3Lenovo Yoga Tablet 10 Screen and Frame Assembly Replacement: step 29, image 3 of 3

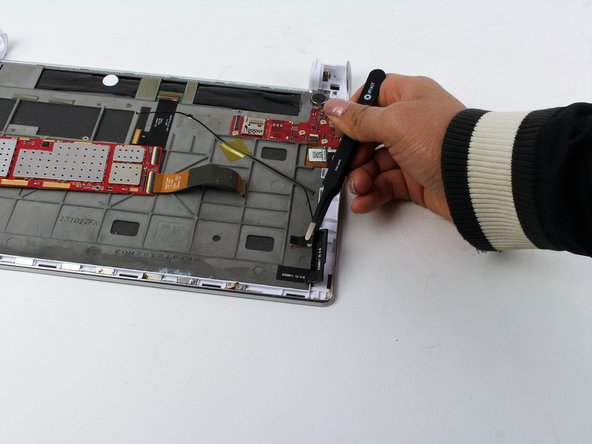
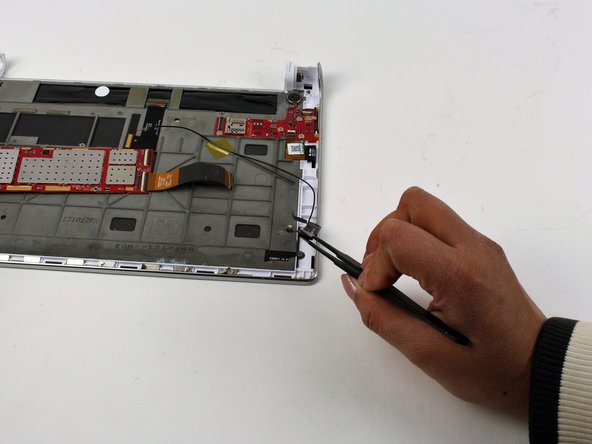
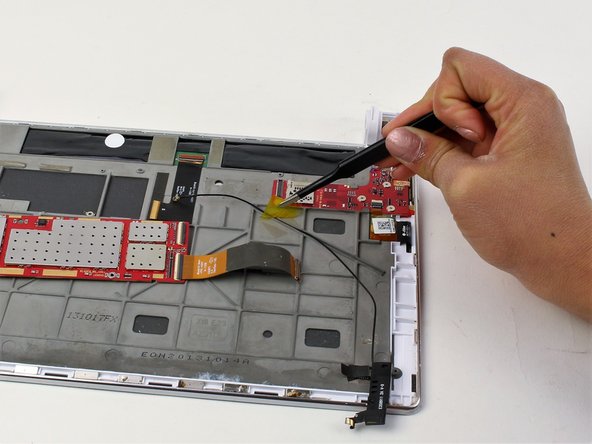
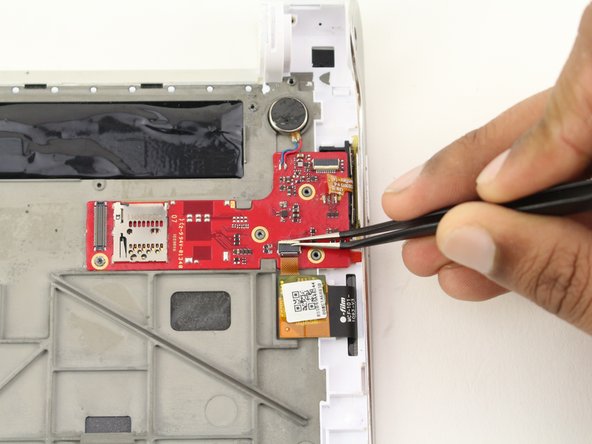
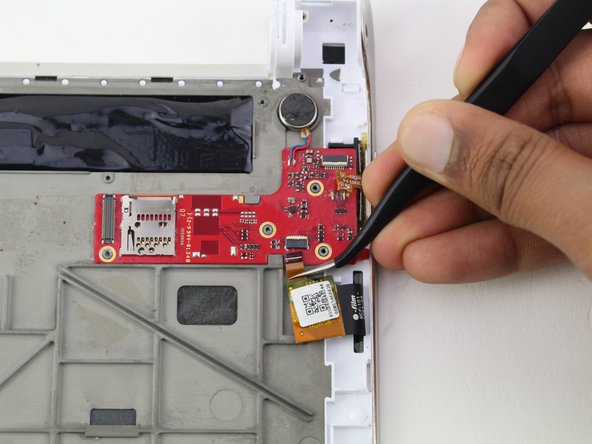
Отсоедините провод, прикрепленный к печатной плате, потянув его пинцетом.

Шаг 30

Lenovo Yoga Tablet 10 Screen and Frame Assembly Replacement: step 30, image 1 of 2Lenovo Yoga Tablet 10 Screen and Frame Assembly Replacement: step 30, image 2 of 2

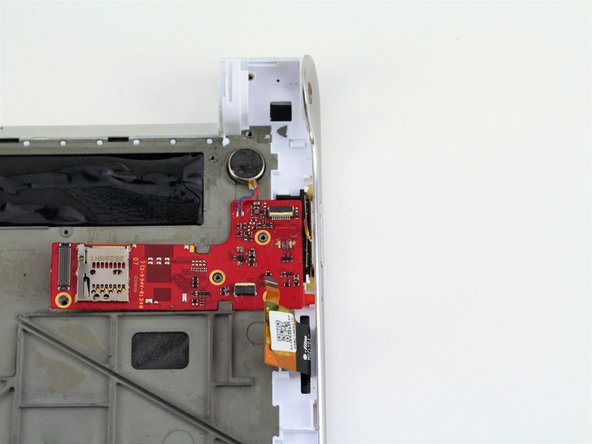
Отпаяйте провод.

Снимите печатную плату и круглый вибромодуль.

Шаг 31

Lenovo Yoga Tablet 10 Screen and Frame Assembly Replacement: step 31, image 1 of 3Lenovo Yoga Tablet 10 Screen and Frame Assembly Replacement: step 31, image 2 of 3Lenovo Yoga Tablet 10 Screen and Frame Assembly Replacement: step 31, image 3 of 3

Пинцетом подденьте печатную плату вместе с круглым вибромодулем с нижнего угла, поднимая ее вверх.

Прецизионный пинцет острый и может повредить печатную плату или вибромодуль.

Комментировать
57 просмотров
Комментариев нет, будьте первым кто его оставит

Это интересно
No Image Гайды
0 комментариев
No Image Гайды
0 комментариев
No Image Гайды
0 комментариев