No Image

Samsung Galaxy Note Edge замена дисплея в сборе

57 просмотров
09 декабря 2023

Введение

Как заменить экран Samsung GalaxyNote Edge / N915 в сборе

_______Видеоинструкция_______

Шаг 1 Извлеките аккумулятор Galaxy Note Edge

Samsung Galaxy Note Edge Display Assembly Replacement, Remove the Galaxy Note Edge Battery: step 1, image 1 of 3Samsung Galaxy Note Edge Display Assembly Replacement, Remove the Galaxy Note Edge Battery: step 1, image 2 of 3Samsung Galaxy Note Edge Display Assembly Replacement, Remove the Galaxy Note Edge Battery: step 1, image 3 of 3

Выключите устройство.

Снимите заднюю крышку и аккумулятор.

Шаг 2 Снимите задний корпус Galaxy Note Edge

Samsung Galaxy Note Edge Display Assembly Replacement, Remove the Galaxy Note Edge Rear Housing: step 2, image 1 of 3Samsung Galaxy Note Edge Display Assembly Replacement, Remove the Galaxy Note Edge Rear Housing: step 2, image 2 of 3Samsung Galaxy Note Edge Display Assembly Replacement, Remove the Galaxy Note Edge Rear Housing: step 2, image 3 of 3

Извлеките карту памяти, SIM-карту и перо S Pen.

Отверткой Phillips #00 открутите винты.

С помощью инструмента для вскрытия пластика извлеките заднюю рамку.

Шаг 3 Извлеките материнскую плату Galaxy Note Edge 1

Samsung Galaxy Note Edge Display Assembly Replacement, Remove the Galaxy Note Edge Motherboard 1: step 3, image 1 of 3Samsung Galaxy Note Edge Display Assembly Replacement, Remove the Galaxy Note Edge Motherboard 1: step 3, image 2 of 3Samsung Galaxy Note Edge Display Assembly Replacement, Remove the Galaxy Note Edge Motherboard 1: step 3, image 3 of 3

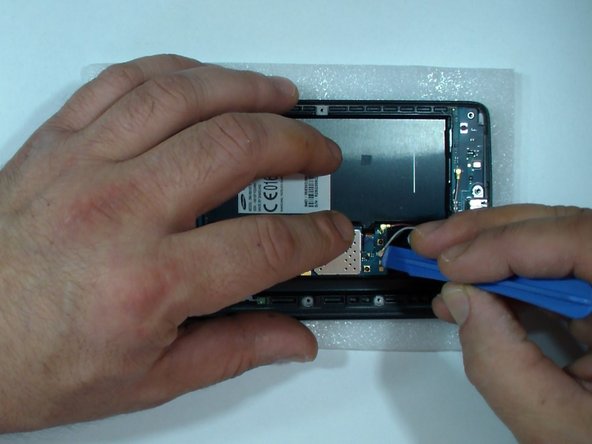
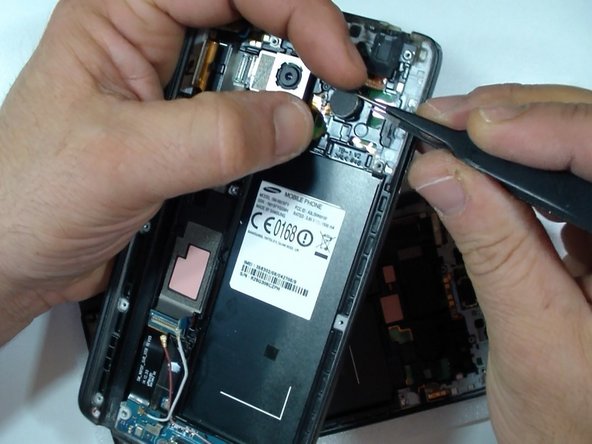
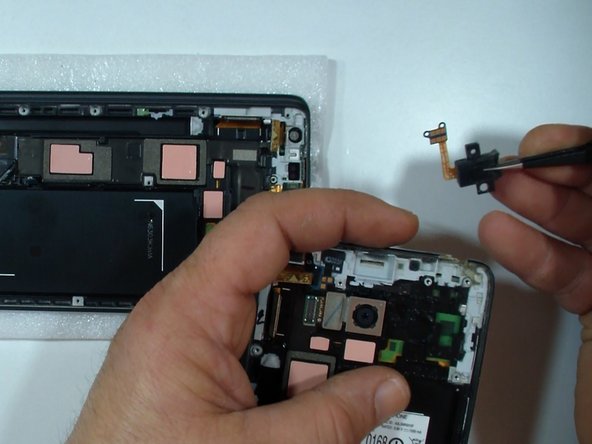
Отсоедините один за другим:

коаксиальный антенный кабель (x2)

гибкий кабель кнопки Home

гибкий кабель дисплея

Гибкий кабель сенсора стилуса

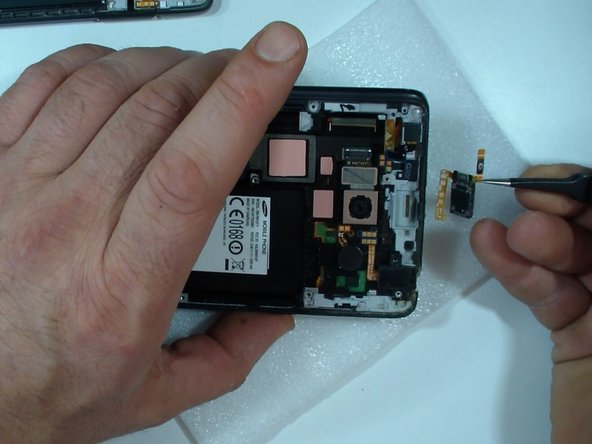
Гибкий кабель фронтальной камеры

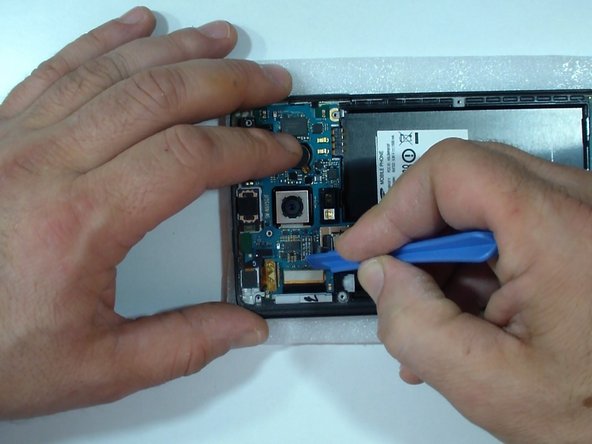
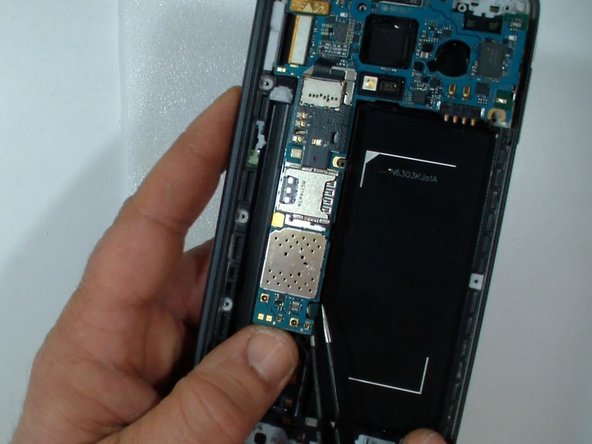
Шаг 4 Извлеките материнскую плату Galaxy Note Edge 2

Samsung Galaxy Note Edge Display Assembly Replacement, Remove the Galaxy Note Edge Motherboard 2: step 4, image 1 of 3Samsung Galaxy Note Edge Display Assembly Replacement, Remove the Galaxy Note Edge Motherboard 2: step 4, image 2 of 3Samsung Galaxy Note Edge Display Assembly Replacement, Remove the Galaxy Note Edge Motherboard 2: step 4, image 3 of 3

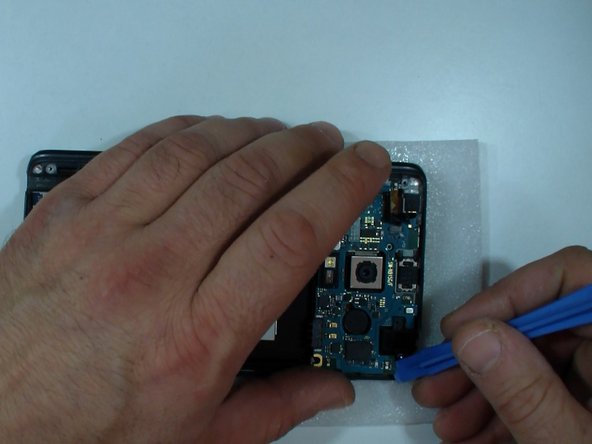
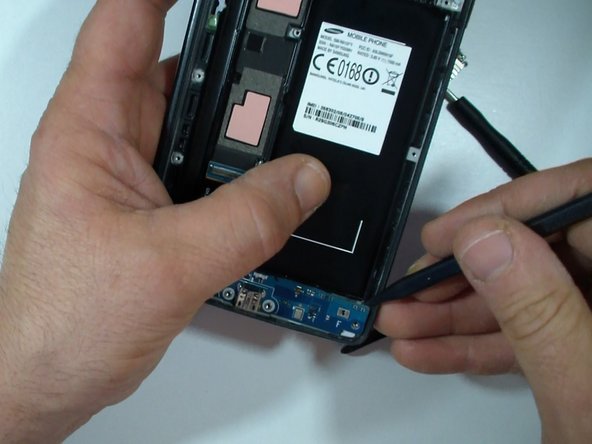
Подденьте разъем на задней стороне платы, чтобы освободить нижнюю часть материнской платы.

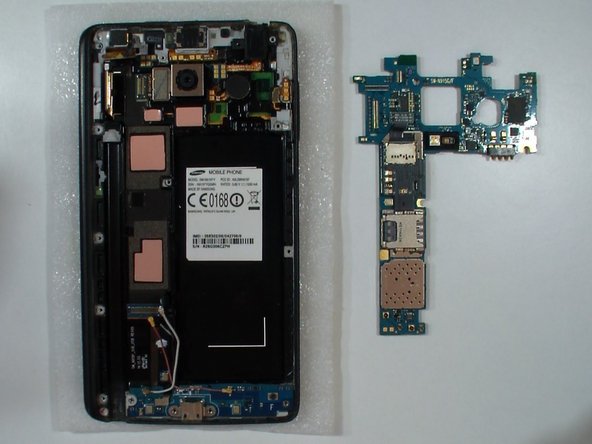
Аккуратно извлеките логическую плату.

Шаг 5 Проверьте новую запасную часть

Samsung Galaxy Note Edge Display Assembly Replacement, Test the new spare part: step 5, image 1 of 3Samsung Galaxy Note Edge Display Assembly Replacement, Test the new spare part: step 5, image 2 of 3Samsung Galaxy Note Edge Display Assembly Replacement, Test the new spare part: step 5, image 3 of 3

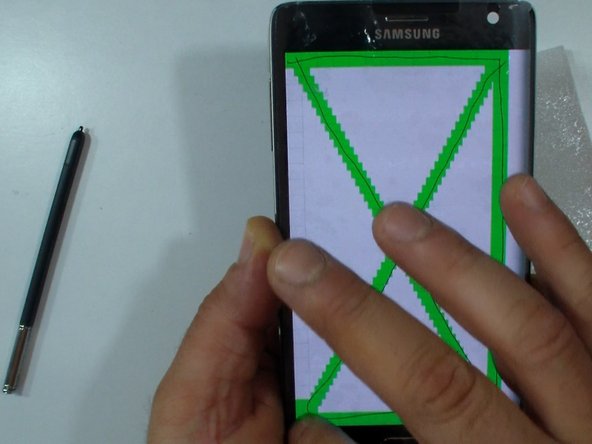
Я предпочитаю тестировать новую запчасть перед ее установкой.

Перенесите гибкий кабель кнопки питания/громкоговорителя.

Установите материнскую плату.

Протестируйте дисплей.

Чтобы не повредить заднюю рамку перед тестированием, установите ее на место.

Шаг 6 Проверка термопрокладок

Samsung Galaxy Note Edge Display Assembly Replacement, Check the Thermal Pads: step 6, image 1 of 1

Проверьте качество термопрокладок (если запасная часть не оригинальная).

При необходимости используйте термопрокладки из старой сборки.

Шаг 7 Перенесите все детали из старой сборки дисплея — часть 1

Samsung Galaxy Note Edge Display Assembly Replacement, Transfer all the parts from the old Display assembly - Part 1: step 7, image 1 of 3Samsung Galaxy Note Edge Display Assembly Replacement, Transfer all the parts from the old Display assembly - Part 1: step 7, image 2 of 3Samsung Galaxy Note Edge Display Assembly Replacement, Transfer all the parts from the old Display assembly - Part 1: step 7, image 3 of 3

Вставьте сюда мудрость.

Шаг 8 Снимите гибкий узел порта зарядки Galaxy Note Edge.

Samsung Galaxy Note Edge Display Assembly Replacement, Remove the Galaxy Note Edge Charging Port Flex Assembly.: step 8, image 1 of 3Samsung Galaxy Note Edge Display Assembly Replacement, Remove the Galaxy Note Edge Charging Port Flex Assembly.: step 8, image 2 of 3Samsung Galaxy Note Edge Display Assembly Replacement, Remove the Galaxy Note Edge Charging Port Flex Assembly.: step 8, image 3 of 3

Выкрутите черный крестообразный винт,

снимите пластину порта зарядки,

отсоедините гибкий кабель кнопки Home

и коаксиальный антенный кабель (x2).

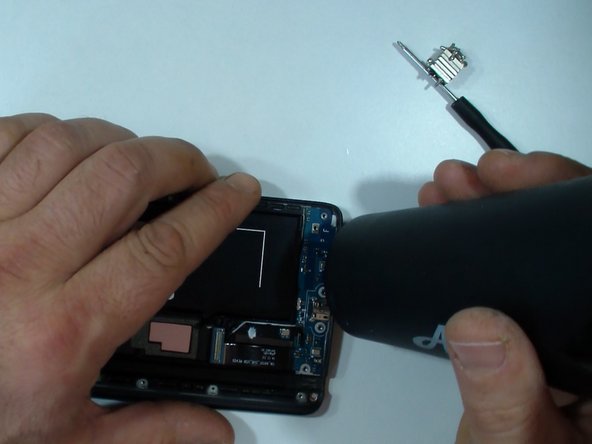
С помощью горячего воздуха и инструмента для вскрытия пластика извлеките гибкий узел порта зарядки.

Шаг 9 Сборка

Samsung Galaxy Note Edge Display Assembly Replacement, Reassembling: step 9, image 1 of 1

Чтобы собрать устройство, следуйте этим инструкциям в обратном порядке.

Комментировать
57 просмотров
Комментариев нет, будьте первым кто его оставит

Это интересно
No Image Гайды
0 комментариев
No Image Гайды
0 комментариев
No Image Гайды
0 комментариев