No Image

Ремонт/замена мембраны твитера Sonos One

СОДЕРЖАНИЕ
103 просмотров
07 декабря 2023

Введение

Это руководство предназначено для замены мембраны твитера в Sonos One.

Важно: Доступ к внутренним компонентам Sonos One приведет к аннулированию заводской гарантии и отказу в ремонте устройства, даже если срок гарантии истек.

Шаг 1 Защитная крышка

Sonos One Tweeter Diaphragm Repair/ Replacement, Protective Cover: step 1, image 1 of 3Sonos One Tweeter Diaphragm Repair/ Replacement, Protective Cover: step 1, image 2 of 3Sonos One Tweeter Diaphragm Repair/ Replacement, Protective Cover: step 1, image 3 of 3

Отсоедините все шнуры питания.

Снимите резиновую ножку и пластиковый защитный винт в нижней части устройства, используя инструмент для вскрытия пластика.

Примечание: резиновую ножку и пластиковый кожух можно снять как единое целое, чтобы облегчить сборку.

Шаг 2

Sonos One Tweeter Diaphragm Repair/ Replacement: step 2, image 1 of 3Sonos One Tweeter Diaphragm Repair/ Replacement: step 2, image 2 of 3Sonos One Tweeter Diaphragm Repair/ Replacement: step 2, image 3 of 3

Выкрутите четыре винта 10 мм Torx T10 из нижней части динамика.

Шаг 3

Sonos One Tweeter Diaphragm Repair/ Replacement: step 3, image 1 of 2Sonos One Tweeter Diaphragm Repair/ Replacement: step 3, image 2 of 2

Снимите нижнюю крышку, слегка сжав защитную крышку и надавив на нее пальцами.

Шаг 4

Sonos One Tweeter Diaphragm Repair/ Replacement: step 4, image 1 of 3Sonos One Tweeter Diaphragm Repair/ Replacement: step 4, image 2 of 3Sonos One Tweeter Diaphragm Repair/ Replacement: step 4, image 3 of 3

Клипса защитной крышки очень тонкая и легко деформируется.

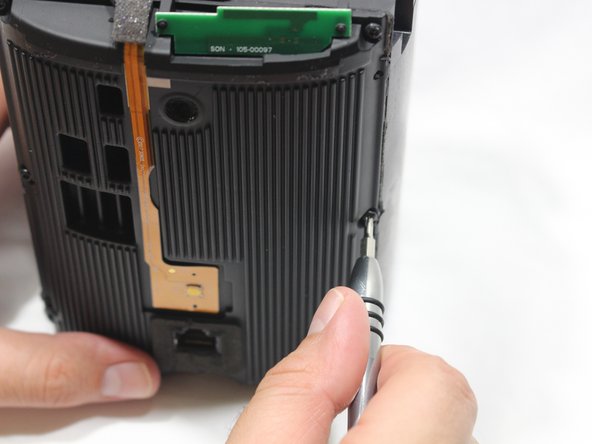
Выкрутите один винт 8 мм Torx T10 и снимите зажим защитной крышки.

Шаг 5

Sonos One Tweeter Diaphragm Repair/ Replacement: step 5, image 1 of 2Sonos One Tweeter Diaphragm Repair/ Replacement: step 5, image 2 of 2

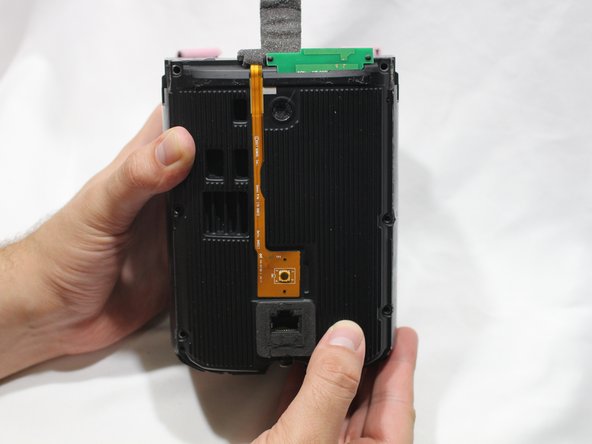
Сдвиньте защитную крышку вверх, чтобы снять ее.

Шаг 6 Панель управления и микрофон

Sonos One Tweeter Diaphragm Repair/ Replacement, Control Panel & Microphone: step 6, image 1 of 3Sonos One Tweeter Diaphragm Repair/ Replacement, Control Panel & Microphone: step 6, image 2 of 3Sonos One Tweeter Diaphragm Repair/ Replacement, Control Panel & Microphone: step 6, image 3 of 3

С помощью заостренного конца шила снимите крышки, скрывающие винты.

Выкрутите четыре винта 9 мм Torx T8 по периметру панели управления.

Шаг 7

Sonos One Tweeter Diaphragm Repair/ Replacement: step 7, image 1 of 2Sonos One Tweeter Diaphragm Repair/ Replacement: step 7, image 2 of 2

Повернув устройство лицевой стороной к себе, поднимите панель управления вверх с помощью больших пальцев.

Панель управления прикреплена к динамику ленточным кабелем, поэтому работайте медленно.

Шаг 8

Sonos One Tweeter Diaphragm Repair/ Replacement: step 8, image 1 of 3Sonos One Tweeter Diaphragm Repair/ Replacement: step 8, image 2 of 3Sonos One Tweeter Diaphragm Repair/ Replacement: step 8, image 3 of 3

Подденьте с помощью шила фиксирующую крышку на гнезде ZIF ленточного кабеля панели управления.

Вытащите ленточный кабель панели управления из гнезда.

Шаг 9

Sonos One Tweeter Diaphragm Repair/ Replacement: step 9, image 1 of 2Sonos One Tweeter Diaphragm Repair/ Replacement: step 9, image 2 of 2

Потяните панель управления в сторону от динамика, чтобы отделить ее.

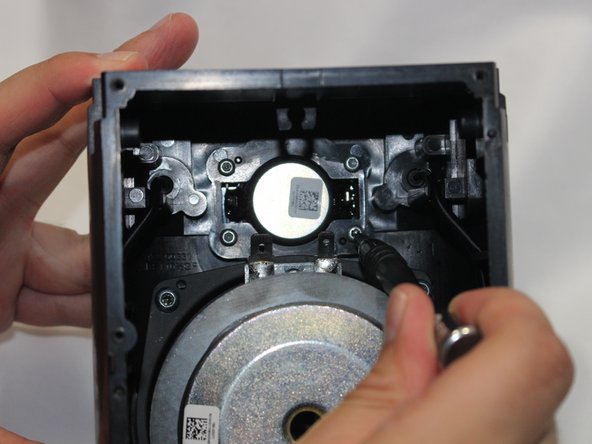
Шаг 10 Розетка адаптера питания

Sonos One Tweeter Diaphragm Repair/ Replacement, Power Adapter Receptacle: step 10, image 1 of 3Sonos One Tweeter Diaphragm Repair/ Replacement, Power Adapter Receptacle: step 10, image 2 of 3Sonos One Tweeter Diaphragm Repair/ Replacement, Power Adapter Receptacle: step 10, image 3 of 3

Выкрутите шесть винтов 9 мм Torx T8 из панели материнской платы.
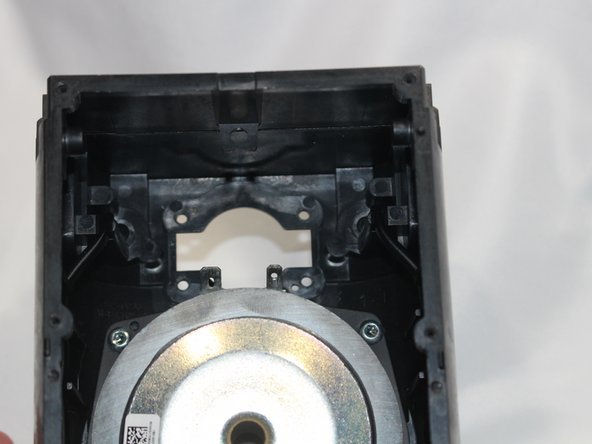
Шаг 11

Sonos One Tweeter Diaphragm Repair/ Replacement: step 11, image 1 of 2Sonos One Tweeter Diaphragm Repair/ Replacement: step 11, image 2 of 2

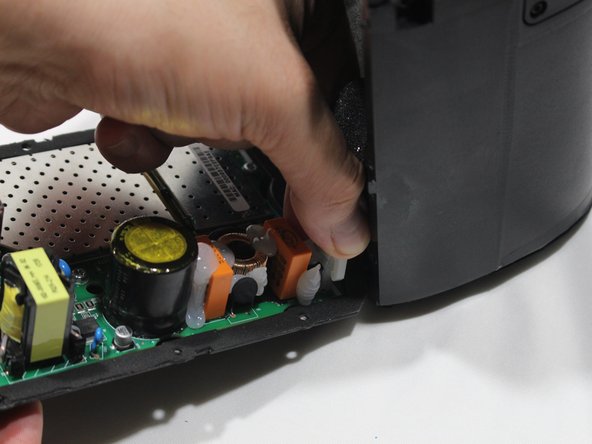
Используя пластиковый инструмент для открывания, отделите материнскую плату от динамика.

Шаг 12

Sonos One Tweeter Diaphragm Repair/ Replacement: step 12, image 1 of 3Sonos One Tweeter Diaphragm Repair/ Replacement: step 12, image 2 of 3Sonos One Tweeter Diaphragm Repair/ Replacement: step 12, image 3 of 3

Большим пальцем отсоедините кабель динамика от материнской платы.

Шаг 13

Sonos One Tweeter Diaphragm Repair/ Replacement: step 13, image 1 of 3Sonos One Tweeter Diaphragm Repair/ Replacement: step 13, image 2 of 3Sonos One Tweeter Diaphragm Repair/ Replacement: step 13, image 3 of 3

Большим пальцем отсоедините штекер адаптера питания от материнской платы.

Шаг 14

Sonos One Tweeter Diaphragm Repair/ Replacement: step 14, image 1 of 3Sonos One Tweeter Diaphragm Repair/ Replacement: step 14, image 2 of 3Sonos One Tweeter Diaphragm Repair/ Replacement: step 14, image 3 of 3

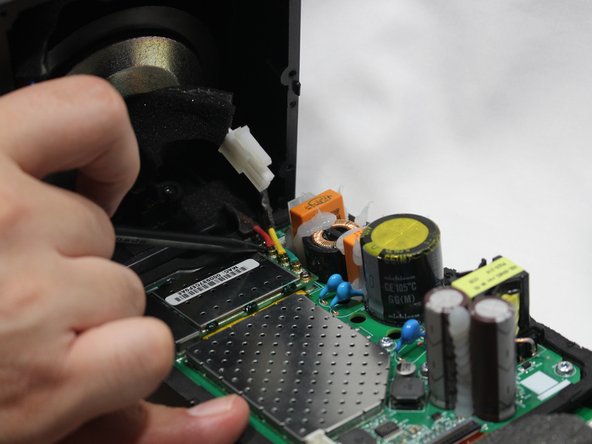
С помощью заостренного конца палочки отсоедините красный, зеленый и желтый кабели, соединяющие передатчик/приемник WiFi.

Шаг 15

Sonos One Tweeter Diaphragm Repair/ Replacement: step 15, image 1 of 2Sonos One Tweeter Diaphragm Repair/ Replacement: step 15, image 2 of 2

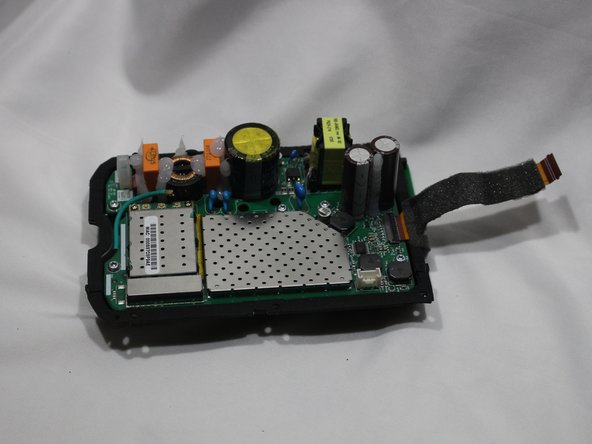
Снимите панель материнской платы с корпуса динамика.
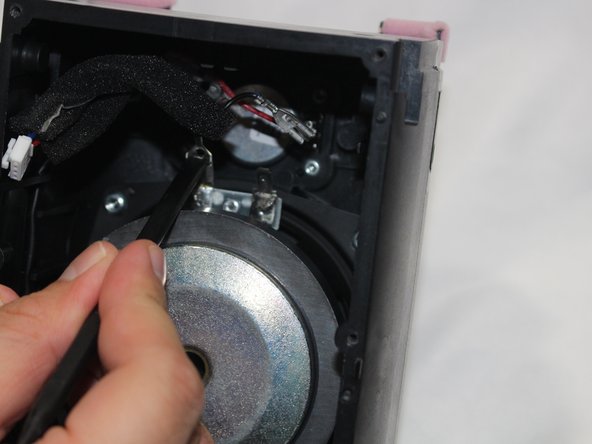
Шаг 16

Sonos One Tweeter Diaphragm Repair/ Replacement: step 16, image 1 of 3Sonos One Tweeter Diaphragm Repair/ Replacement: step 16, image 2 of 3Sonos One Tweeter Diaphragm Repair/ Replacement: step 16, image 3 of 3

НЧ-динамик сильно магнитится, поэтому извлечение металлических винтов может быть затруднено.

Выкрутите два винта 9 мм Torx T8 из разъема адаптера питания.

Извлеките розетку адаптера питания из гнезда в корпусе.

Шаг 17 Мембрана твитера

Sonos One Tweeter Diaphragm Repair/ Replacement, Tweeter Diaphragm: step 17, image 1 of 3Sonos One Tweeter Diaphragm Repair/ Replacement, Tweeter Diaphragm: step 17, image 2 of 3Sonos One Tweeter Diaphragm Repair/ Replacement, Tweeter Diaphragm: step 17, image 3 of 3

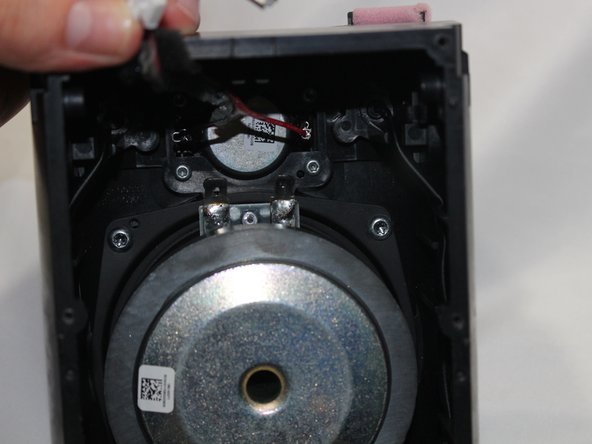
Отсоедините кабели НЧ-динамика.

Если извлечение язычков затруднено, можно надавить на средний язычок плоским концом пассатижей, а затем потянуть за него, чтобы отсоединить.

Шаг 18

Sonos One Tweeter Diaphragm Repair/ Replacement: step 18, image 1 of 3Sonos One Tweeter Diaphragm Repair/ Replacement: step 18, image 2 of 3Sonos One Tweeter Diaphragm Repair/ Replacement: step 18, image 3 of 3

Отсоедините кабели от твитера.

Шаг 19

Sonos One Tweeter Diaphragm Repair/ Replacement: step 19, image 1 of 3Sonos One Tweeter Diaphragm Repair/ Replacement: step 19, image 2 of 3Sonos One Tweeter Diaphragm Repair/ Replacement: step 19, image 3 of 3

Выкрутите четыре винта 10 мм Torx T10 из твитера.

Извлеките твитер из корпуса динамика.

Комментировать
103 просмотров
Комментариев нет, будьте первым кто его оставит

Это интересно