No Image

Замена ЖК-дисплея и кнопок Olympus Stylus 1030 SW

36 просмотров
17 декабря 2023

Шаг 1 Разборка фотоаппарата Olympus Stylus 1030 SW

Olympus Stylus 1030 SW LCD and Button Replacement, Olympus Stylus 1030 SW Camera Disassembly: step 1, image 1 of 3Olympus Stylus 1030 SW LCD and Button Replacement, Olympus Stylus 1030 SW Camera Disassembly: step 1, image 2 of 3Olympus Stylus 1030 SW LCD and Button Replacement, Olympus Stylus 1030 SW Camera Disassembly: step 1, image 3 of 3

С помощью инструмента для открывания iFixit подденьте пластиковую часть объектива.

С помощью отвертки T6 Torx открутите три винта.

Шаг 2

Olympus Stylus 1030 SW LCD and Button Replacement: step 2, image 1 of 3Olympus Stylus 1030 SW LCD and Button Replacement: step 2, image 2 of 3Olympus Stylus 1030 SW LCD and Button Replacement: step 2, image 3 of 3

С помощью отвертки Phillips #00 открутите три винта.

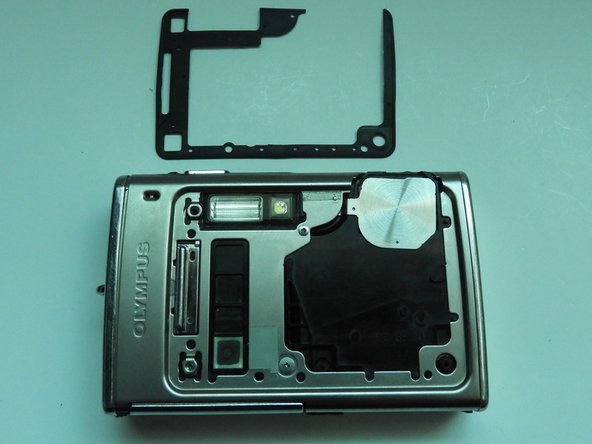
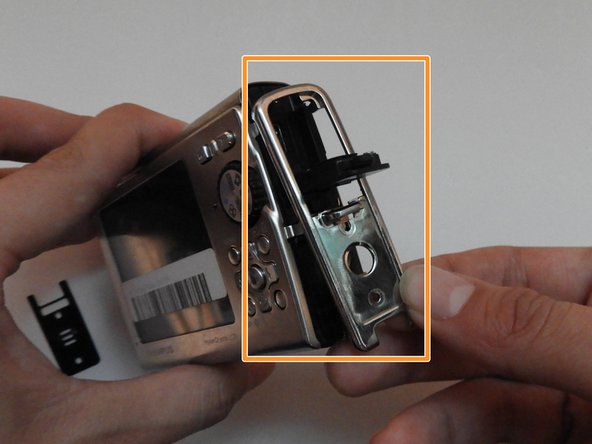
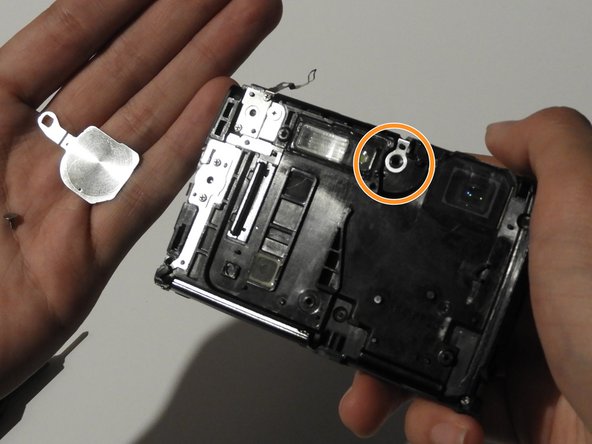
Осторожно поверните металлическую крышку по направлению к себе.

С помощью пинцета снимите металлическую шайбу.
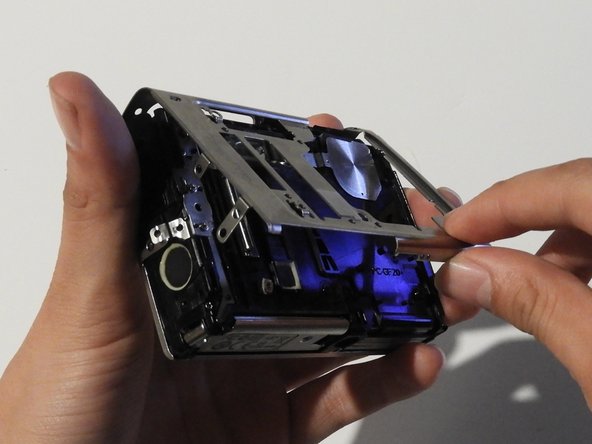
Шаг 3

Olympus Stylus 1030 SW LCD and Button Replacement: step 3, image 1 of 2Olympus Stylus 1030 SW LCD and Button Replacement: step 3, image 2 of 2

Используя пинцет, медленно отделите пластину.

Шаг 4

Olympus Stylus 1030 SW LCD and Button Replacement: step 4, image 1 of 3Olympus Stylus 1030 SW LCD and Button Replacement: step 4, image 2 of 3Olympus Stylus 1030 SW LCD and Button Replacement: step 4, image 3 of 3

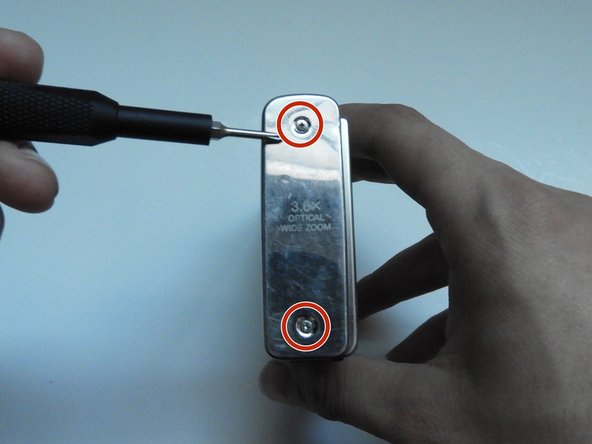
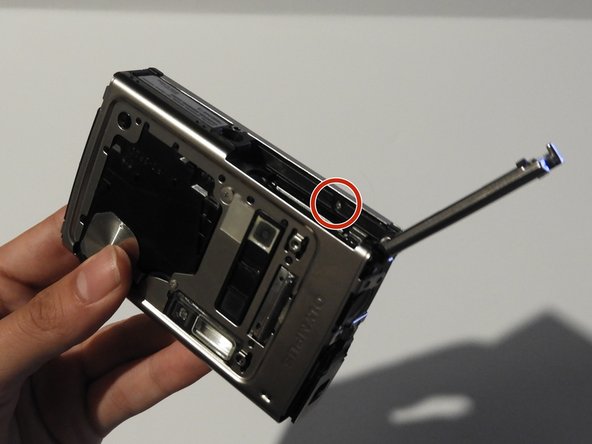
С помощью отвертки Phillips #00 открутите два винта на боковой стороне камеры.

Шаг 5

Olympus Stylus 1030 SW LCD and Button Replacement: step 5, image 1 of 3Olympus Stylus 1030 SW LCD and Button Replacement: step 5, image 2 of 3Olympus Stylus 1030 SW LCD and Button Replacement: step 5, image 3 of 3

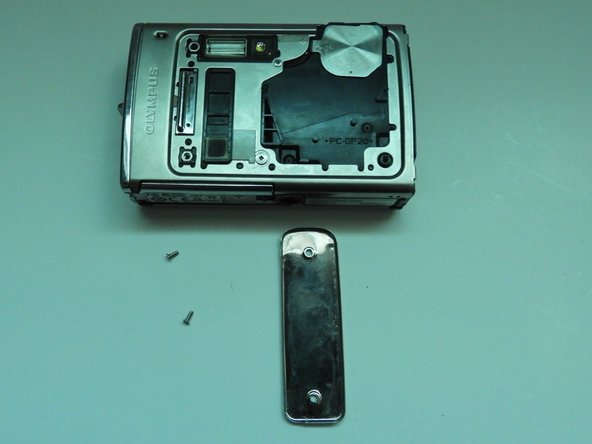
На противоположной стороне с помощью отвертки Phillips #00 открутите оба винта.

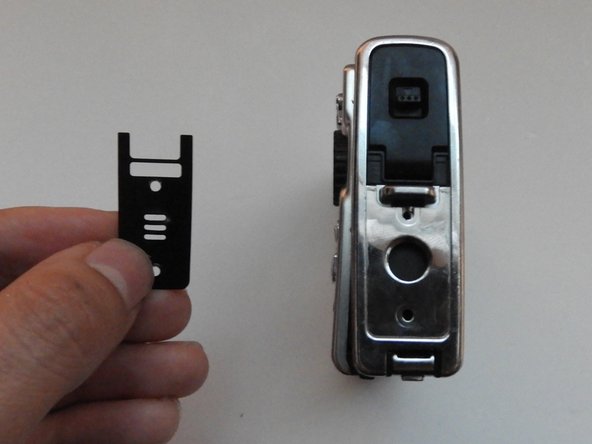
Выньте пластину динамика.

Откройте крышку мультиразъема и сдвиньте боковую панель.
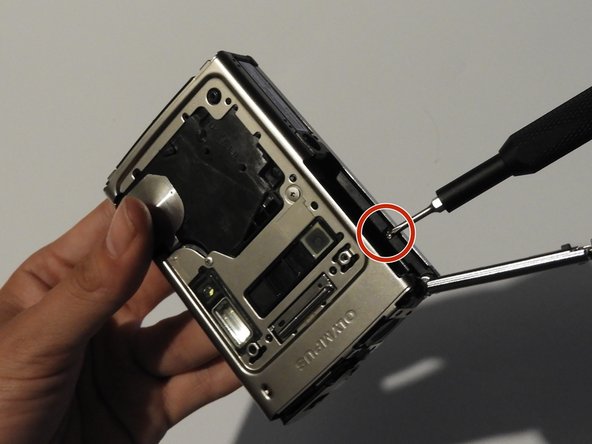
Шаг 6

Olympus Stylus 1030 SW LCD and Button Replacement: step 6, image 1 of 3Olympus Stylus 1030 SW LCD and Button Replacement: step 6, image 2 of 3Olympus Stylus 1030 SW LCD and Button Replacement: step 6, image 3 of 3

С помощью отвертки Phillips #00 открутите винт над динамиком.

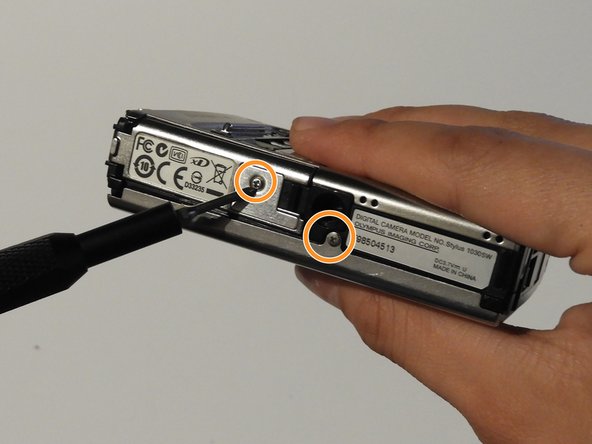
На нижней стороне камеры открутите два винта.

Шаг 7

Olympus Stylus 1030 SW LCD and Button Replacement: step 7, image 1 of 3Olympus Stylus 1030 SW LCD and Button Replacement: step 7, image 2 of 3Olympus Stylus 1030 SW LCD and Button Replacement: step 7, image 3 of 3

Откройте крышку батарейного отсека.

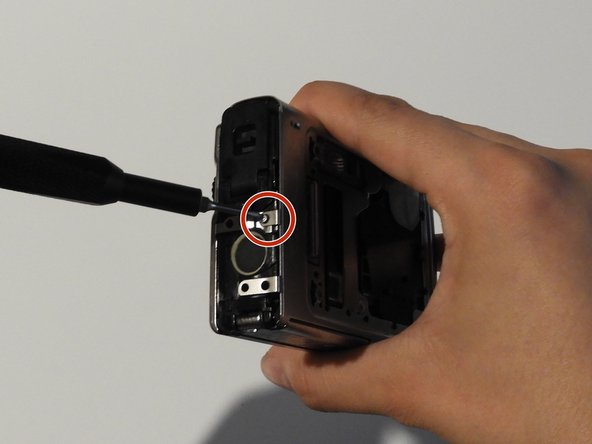
С помощью отвертки Phillips #00 открутите винт в батарейном отсеке.

Шаг 8

Olympus Stylus 1030 SW LCD and Button Replacement: step 8, image 1 of 3Olympus Stylus 1030 SW LCD and Button Replacement: step 8, image 2 of 3Olympus Stylus 1030 SW LCD and Button Replacement: step 8, image 3 of 3

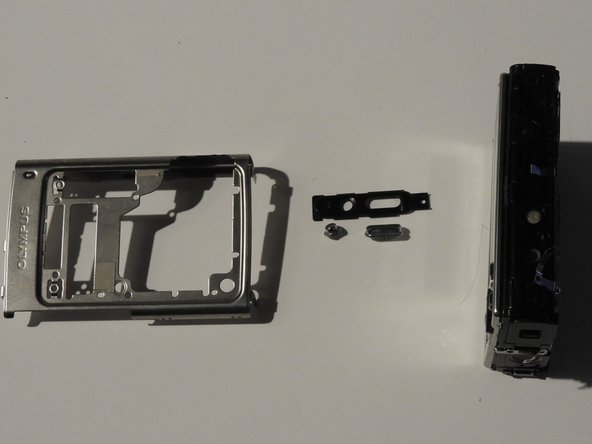
На передней панели камеры открутите два винта, показанных на рисунке.

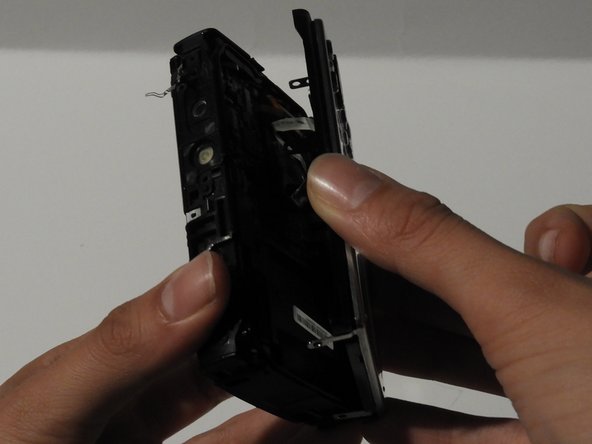
Аккуратно потяните за боковую часть, пока камера не отделится от задней панели.

Снимите затвор и кнопку питания.

Шаг 9

Olympus Stylus 1030 SW LCD and Button Replacement: step 9, image 1 of 3Olympus Stylus 1030 SW LCD and Button Replacement: step 9, image 2 of 3Olympus Stylus 1030 SW LCD and Button Replacement: step 9, image 3 of 3

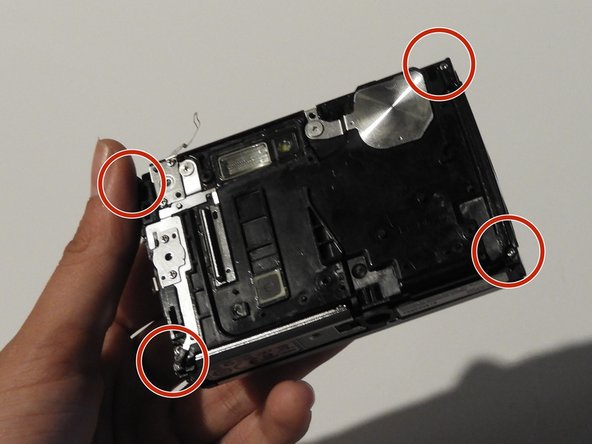
С помощью отвертки Phillips #00 открутите четыре винта на передней панели камеры.

Открутите затвор с помощью отвертки Phillips #00.

Шаг 10

Olympus Stylus 1030 SW LCD and Button Replacement: step 10, image 1 of 2Olympus Stylus 1030 SW LCD and Button Replacement: step 10, image 2 of 2

Освободите верхний держатель с помощью пробки.

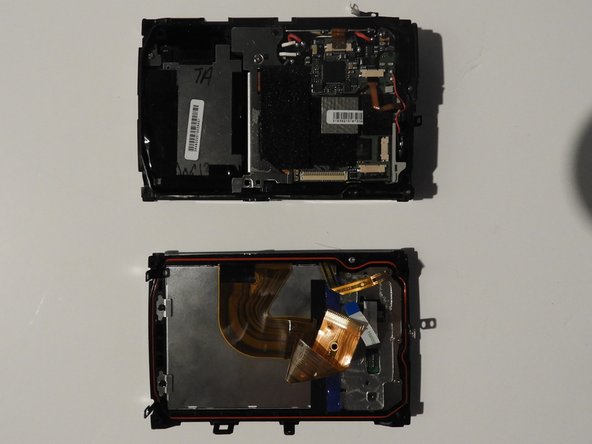
Медленно и осторожно отделите переднюю и заднюю части камеры, обнажив электрические ленты.

Шаг 11

Olympus Stylus 1030 SW LCD and Button Replacement: step 11, image 1 of 3Olympus Stylus 1030 SW LCD and Button Replacement: step 11, image 2 of 3Olympus Stylus 1030 SW LCD and Button Replacement: step 11, image 3 of 3

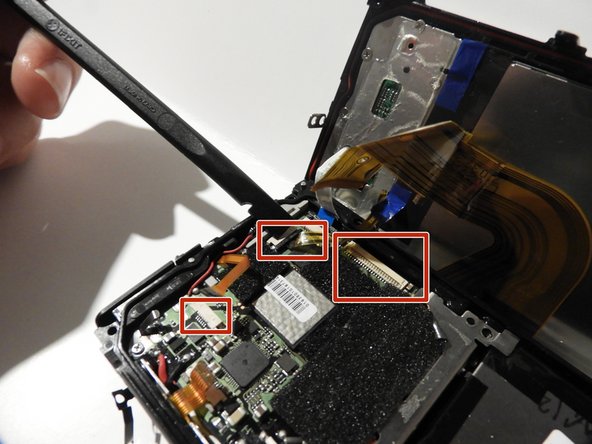
С помощью пробки и, при необходимости, пинцета отсоедините ленты от компьютерных микросхем.

Шаг 12 ЖК-дисплей и кнопки

Olympus Stylus 1030 SW LCD and Button Replacement, LCD and Buttons: step 12, image 1 of 3Olympus Stylus 1030 SW LCD and Button Replacement, LCD and Buttons: step 12, image 2 of 3Olympus Stylus 1030 SW LCD and Button Replacement, LCD and Buttons: step 12, image 3 of 3

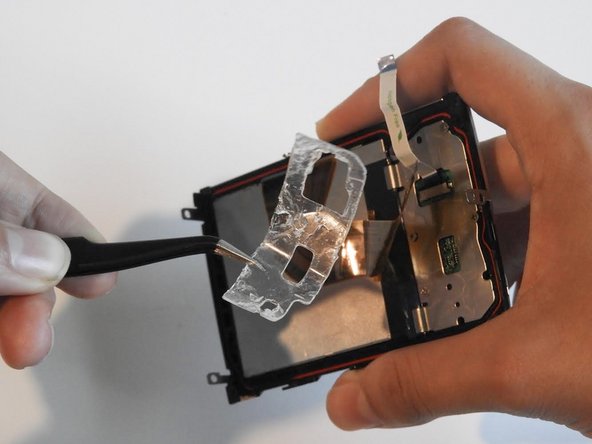
Открутите два винта на левой стороне экрана с помощью головки PH#00.

Отклейте гелевую ленту с помощью пинцета.

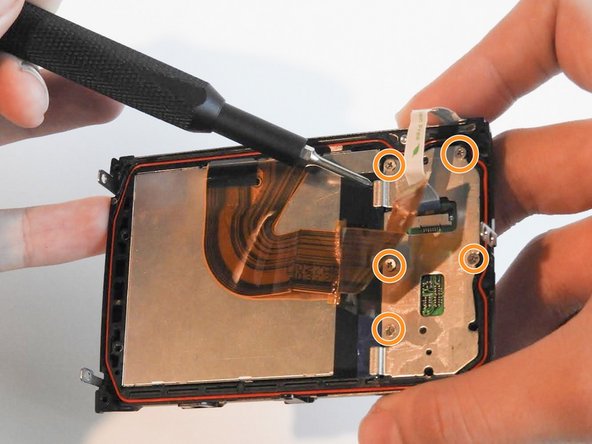
Открутите пять винтов диаметром 0,6 мм с помощью отвертки Phillips #00.

Шаг 13

Olympus Stylus 1030 SW LCD and Button Replacement: step 13, image 1 of 2Olympus Stylus 1030 SW LCD and Button Replacement: step 13, image 2 of 2

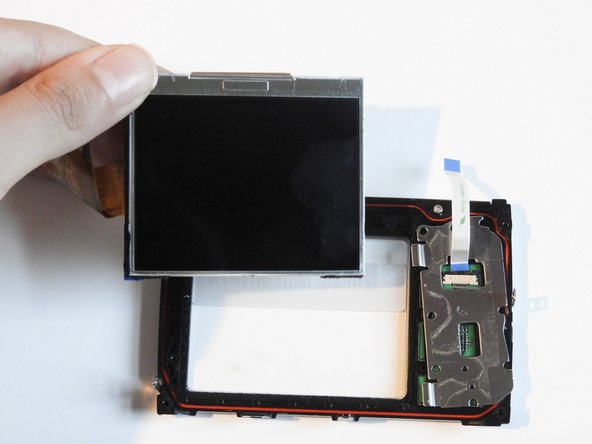
С помощью палочки аккуратно подденьте ЖК-экран.

Шаг 14

Olympus Stylus 1030 SW LCD and Button Replacement: step 14, image 1 of 3Olympus Stylus 1030 SW LCD and Button Replacement: step 14, image 2 of 3Olympus Stylus 1030 SW LCD and Button Replacement: step 14, image 3 of 3

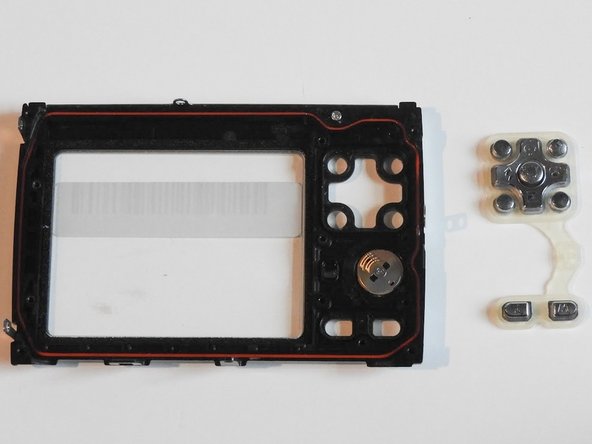
С помощью пинцета извлеките резиновый держатель кнопок и сами кнопки.

Комментировать
36 просмотров
Комментариев нет, будьте первым кто его оставит

Это интересно
No Image Гайды
0 комментариев
No Image Гайды
0 комментариев
No Image Гайды
0 комментариев