No Image

Замена жесткого диска Dell Optiplex 745 Small Form Factor

109 просмотров
17 декабря 2023

Введение

Это руководство поможет вам извлечь жесткий диск для замены.

Шаг 1 Открытие корпуса

Dell Optiplex 745 Small Form Factor Hard Drive Replacement, Opening the case: step 1, image 1 of 2Dell Optiplex 745 Small Form Factor Hard Drive Replacement, Opening the case: step 1, image 2 of 2

Потяните за выступ, и крышка поднимется вверх.

Шаг 2

Dell Optiplex 745 Small Form Factor Hard Drive Replacement: step 2, image 1 of 2Dell Optiplex 745 Small Form Factor Hard Drive Replacement: step 2, image 2 of 2

Возьмитесь за крышку, потяните ее вверх и снимите.

Шаг 3 Отсоединение кабелей

Dell Optiplex 745 Small Form Factor Hard Drive Replacement, Disconnecting the cables: step 3, image 1 of 2Dell Optiplex 745 Small Form Factor Hard Drive Replacement, Disconnecting the cables: step 3, image 2 of 2

Вытащите оба комплекта кабелей со стороны оптического привода.

Оба кабеля подключены к приводу рядом друг с другом.

Шаг 4 Извлечение оптического привода

Dell Optiplex 745 Small Form Factor Hard Drive Replacement, Removing the optical drive: step 4, image 1 of 2Dell Optiplex 745 Small Form Factor Hard Drive Replacement, Removing the optical drive: step 4, image 2 of 2

Потяните вверх за выступ, удерживающий оптический привод на месте.

Выдвиньте оптический привод.

Шаг 5 Извлеките лоток под оптическим приводом

Dell Optiplex 745 Small Form Factor Hard Drive Replacement, Remove the tray under the optical drive: step 5, image 1 of 3Dell Optiplex 745 Small Form Factor Hard Drive Replacement, Remove the tray under the optical drive: step 5, image 2 of 3Dell Optiplex 745 Small Form Factor Hard Drive Replacement, Remove the tray under the optical drive: step 5, image 3 of 3

Поверните компьютер на 180 градусов.

Потяните металлический выступ вверх.

Потяните лоток в сторону от корпуса.

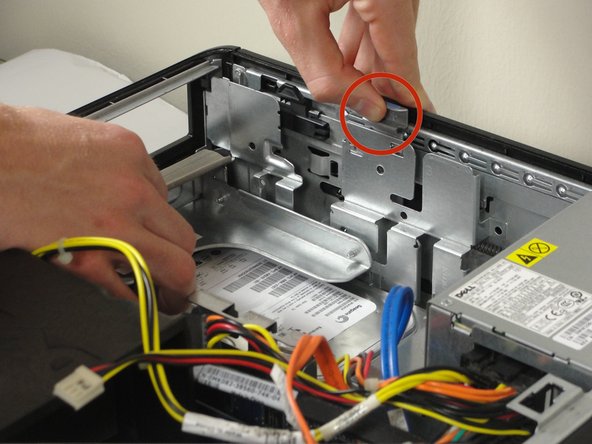
Шаг 6 Снимите корпус жесткого диска

Dell Optiplex 745 Small Form Factor Hard Drive Replacement, Remove the hard drive case: step 6, image 1 of 3Dell Optiplex 745 Small Form Factor Hard Drive Replacement, Remove the hard drive case: step 6, image 2 of 3Dell Optiplex 745 Small Form Factor Hard Drive Replacement, Remove the hard drive case: step 6, image 3 of 3

Прижмите 2 маленьких синих язычка друг к другу.

Вставьте большой синий выступ в жесткий диск и отодвиньте его от стенки башни.

Поднимите жесткий диск из корпуса после того, как он освободится.

Шаг 7 Извлеките провода

Dell Optiplex 745 Small Form Factor Hard Drive Replacement, Remove the wires: step 7, image 1 of 2Dell Optiplex 745 Small Form Factor Hard Drive Replacement, Remove the wires: step 7, image 2 of 2

Вытащите оба пучка проводов, подключенных к жесткому диску.

Переверните жесткий диск так, чтобы синий корпус был обращен вниз, а маркированные выступы были направлены к вам.

Шаг 8 Отделите жесткий диск от корпуса.

Dell Optiplex 745 Small Form Factor Hard Drive Replacement, Separate the hard drive and case.: step 8, image 1 of 3Dell Optiplex 745 Small Form Factor Hard Drive Replacement, Separate the hard drive and case.: step 8, image 2 of 3Dell Optiplex 745 Small Form Factor Hard Drive Replacement, Separate the hard drive and case.: step 8, image 3 of 3

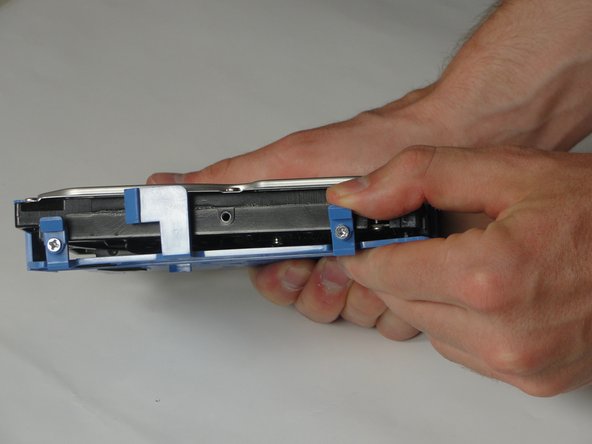
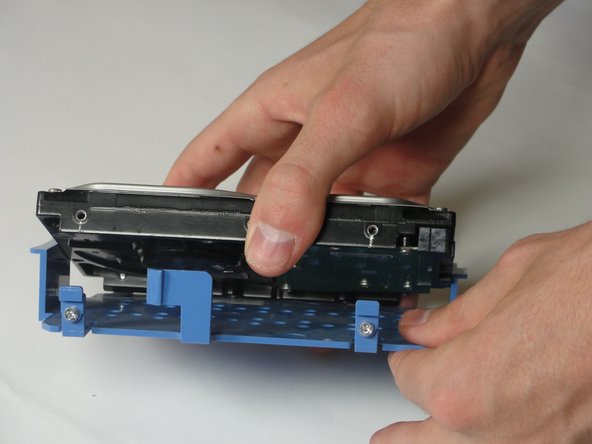
Потяните 2 синих выступа в сторону от жесткого диска, а затем потяните корпус жесткого диска вниз.

Комментировать
109 просмотров
Комментариев нет, будьте первым кто его оставит

Это интересно
No Image Гайды
0 комментариев
No Image Гайды
0 комментариев
No Image Гайды
0 комментариев