No Image

Замена термостатического картриджа — Термостатическая ванна NF SIRYO CHROME

97 просмотров
09 декабря 2023

Шаг 1 Необходимые инструменты

Changing the thermostatic cartridge - Thermostatic Bath NF SIRYO CHROME, Required tools: step 1, image 1 of 1

24-миллиметровый ключ

21-миллиметровый ключ

Плоская отвертка

Крестовая отвертка

Шаг 2 Доступ к инвертору

Changing the thermostatic cartridge - Thermostatic Bath NF SIRYO CHROME, Access to the inverter: step 2, image 1 of 3Changing the thermostatic cartridge - Thermostatic Bath NF SIRYO CHROME, Access to the inverter: step 2, image 2 of 3Changing the thermostatic cartridge - Thermostatic Bath NF SIRYO CHROME, Access to the inverter: step 2, image 3 of 3

ВНИМАНИЕ: Перед разборкой инвертора не забудьте перекрыть подачу воды от счетчика.

Убедитесь, что рукоятка реверса находится в положении «OFF».

С помощью маленькой плоской отвертки отсоедините крышку доступа от винта, который удерживает ее на месте.

С помощью крестовой отвертки открутите крепежный винт ручки.

Шаг 3 Снятие рукоятки инвертора

Changing the thermostatic cartridge - Thermostatic Bath NF SIRYO CHROME, Removal of the handle of the inverter: step 3, image 1 of 2Changing the thermostatic cartridge - Thermostatic Bath NF SIRYO CHROME, Removal of the handle of the inverter: step 3, image 2 of 2

Открутите рукоятку.

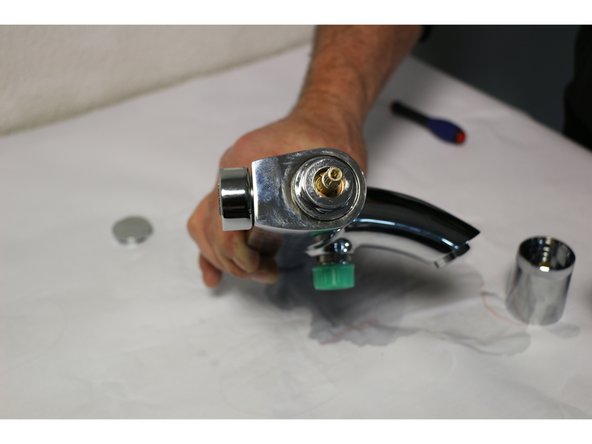
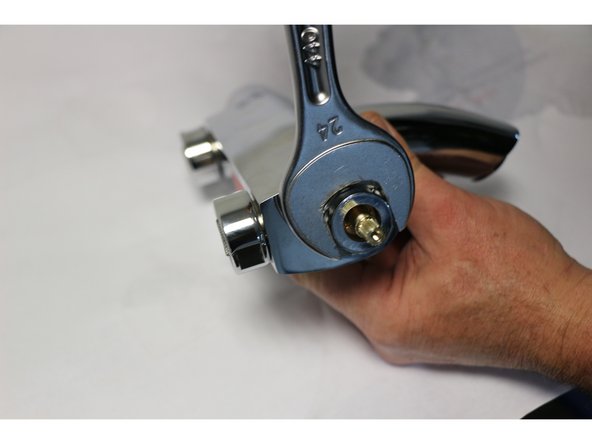
Шаг 4 Разборка инвертора

Changing the thermostatic cartridge - Thermostatic Bath NF SIRYO CHROME, Disassembly of the inverter: step 4, image 1 of 2Changing the thermostatic cartridge - Thermostatic Bath NF SIRYO CHROME, Disassembly of the inverter: step 4, image 2 of 2

С помощью плоского ключа на 24 открутите гайку против часовой стрелки.
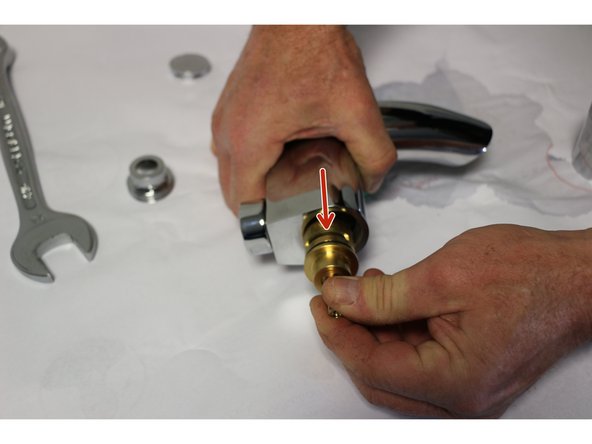
Снимите инвертор.

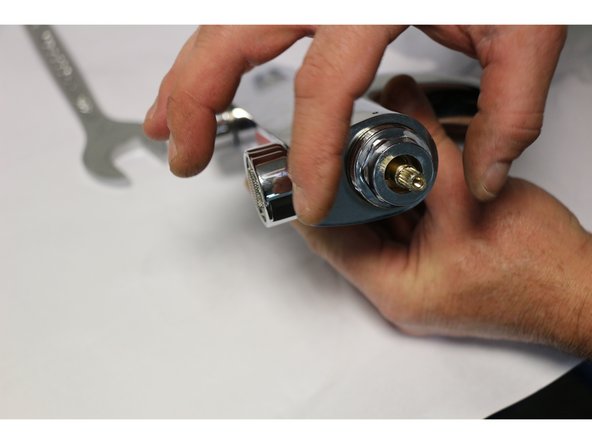
Шаг 5 Замена инвертора
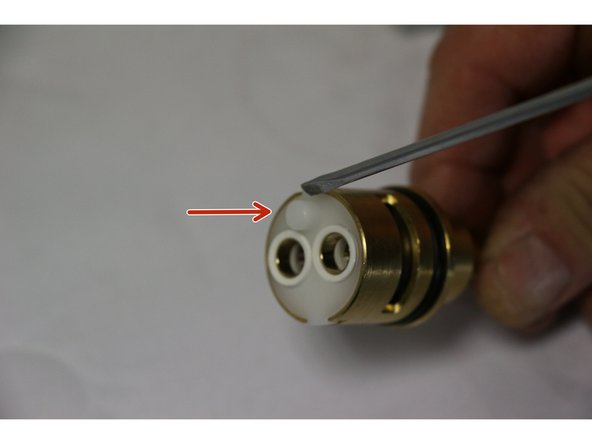
Changing the thermostatic cartridge - Thermostatic Bath NF SIRYO CHROME, Replacement of the inverter: step 5, image 1 of 3Changing the thermostatic cartridge - Thermostatic Bath NF SIRYO CHROME, Replacement of the inverter: step 5, image 2 of 3Changing the thermostatic cartridge - Thermostatic Bath NF SIRYO CHROME, Replacement of the inverter: step 5, image 3 of 3

Замена инвертора

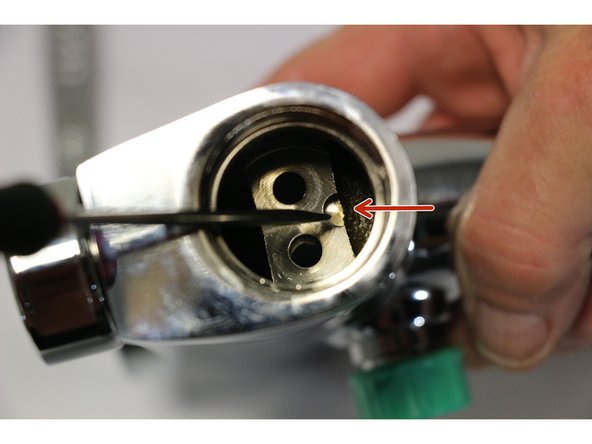
Пожалуйста, убедитесь, что штифт преобразователя правильно совмещен с выемкой, указанной стрелкой на корпусе смесителя.

Шаг 6 Сборка

Changing the thermostatic cartridge - Thermostatic Bath NF SIRYO CHROME, Reassembly: step 6, image 1 of 3Changing the thermostatic cartridge - Thermostatic Bath NF SIRYO CHROME, Reassembly: step 6, image 2 of 3Changing the thermostatic cartridge - Thermostatic Bath NF SIRYO CHROME, Reassembly: step 6, image 3 of 3

Вставьте дивертор в корпус смесителя.

Затяните вручную гайку крепления дивертора по часовой стрелке.

Завершите затяжку с помощью 24-миллиметрового ключа.

Шаг 7 Установка ручки на место

Changing the thermostatic cartridge - Thermostatic Bath NF SIRYO CHROME, Putting the handle back in place: step 7, image 1 of 3Changing the thermostatic cartridge - Thermostatic Bath NF SIRYO CHROME, Putting the handle back in place: step 7, image 2 of 3Changing the thermostatic cartridge - Thermostatic Bath NF SIRYO CHROME, Putting the handle back in place: step 7, image 3 of 3

Совместите контрольную точку на корпусе смесителя с меткой «OFF» на рукоятке.

Затяните крепежный винт рукоятки с помощью крестовой отвертки по часовой стрелке.

Установите крышку на место.

Комментировать
97 просмотров
Комментариев нет, будьте первым кто его оставит

Это интересно
No Image Гайды
0 комментариев
No Image Гайды
0 комментариев
No Image Гайды
0 комментариев