No Image

Замена соленоида диспенсера холодильника Whirlpool

СОДЕРЖАНИЕ
65 просмотров
17 декабря 2023

Введение

Используйте это руководство для замены соленоида диспенсера в холодильнике Whirlpool.

Соленоид диспенсера управляет или приводит в действие дозирование воды. Если холодильник не выдает воду должным образом, возможно, сломан соленоид диспенсера.

Это руководство подходит для большинства холодильников Whirlpool. Это руководство написано на примере холодильника модели WRS315SDHW. Если у вас другая модель, вы можете столкнуться с некоторыми незначительными различиями в разборке, но в целом процесс ремонта будет таким же.

Примечание: На некоторых фотографиях для наглядности показаны снятые дверцы. Их снятие не требуется и не изменит процедуру.

Шаг 1 Меры предосторожности

Whirlpool Refrigerator Dispenser Solenoid Replacement, Safety precautions: step 1, image 1 of 1

Прежде чем приступить к ремонту, выполните следующее:

Отключите основное водоснабжение

Отключите устройство от сети

Шаг 2 Откройте дверцы

Whirlpool Refrigerator Dispenser Solenoid Replacement, Open the doors: step 2, image 1 of 3Whirlpool Refrigerator Dispenser Solenoid Replacement, Open the doors: step 2, image 2 of 3Whirlpool Refrigerator Dispenser Solenoid Replacement, Open the doors: step 2, image 3 of 3

В зависимости от вида ремонта откройте одну или обе дверцы.

Шаг 3 Извлеките поддон ледогенератора

Whirlpool Refrigerator Dispenser Solenoid Replacement, Remove the icemaker tray: step 3, image 1 of 2Whirlpool Refrigerator Dispenser Solenoid Replacement, Remove the icemaker tray: step 3, image 2 of 2

Полностью извлеките лоток ледогенератора из его гнезда в корпусе.

Шаг 4 Открепите узел льдогенератора

Whirlpool Refrigerator Dispenser Solenoid Replacement, Unfasten the icemaker assembly: step 4, image 1 of 2Whirlpool Refrigerator Dispenser Solenoid Replacement, Unfasten the icemaker assembly: step 4, image 2 of 2

Выкрутите винт(ы), крепящий(ие) узел льдогенератора.

На второй фотографии показаны возможные места расположения винтов в снятом блоке льдогенератора.

Шаг 5 Переустановка блока ледогенератора

Whirlpool Refrigerator Dispenser Solenoid Replacement, Reposition the icemaker assembly: step 5, image 1 of 3Whirlpool Refrigerator Dispenser Solenoid Replacement, Reposition the icemaker assembly: step 5, image 2 of 3Whirlpool Refrigerator Dispenser Solenoid Replacement, Reposition the icemaker assembly: step 5, image 3 of 3

Извлеките узел ледогенератора из его гнезда в корпусе.

Оставьте узел висеть, чтобы получить доступ к его разъемам.

Шаг 6 Отсоедините узел ледогенератора

Whirlpool Refrigerator Dispenser Solenoid Replacement, Disconnect the icemaker assembly: step 6, image 1 of 3Whirlpool Refrigerator Dispenser Solenoid Replacement, Disconnect the icemaker assembly: step 6, image 2 of 3Whirlpool Refrigerator Dispenser Solenoid Replacement, Disconnect the icemaker assembly: step 6, image 3 of 3

Отсоедините все разъемы, подключенные к блоку ледогенератора.

Шаг 7 Извлеките узел ледогенератора

Whirlpool Refrigerator Dispenser Solenoid Replacement, Remove the icemaker assembly: step 7, image 1 of 1

Снимите сборку ледогенератора.

Шаг 8 Открепите узел шнека льдогенератора

Whirlpool Refrigerator Dispenser Solenoid Replacement, Unfasten the icemaker auger assembly: step 8, image 1 of 1

Выкрутите винт(ы), крепящий(ие) узел шнека ледогенератора.

Шаг 9 Установите шнек ледогенератора в сборе на место

Whirlpool Refrigerator Dispenser Solenoid Replacement, Reposition the icemaker auger assembly: step 9, image 1 of 3Whirlpool Refrigerator Dispenser Solenoid Replacement, Reposition the icemaker auger assembly: step 9, image 2 of 3Whirlpool Refrigerator Dispenser Solenoid Replacement, Reposition the icemaker auger assembly: step 9, image 3 of 3

Вытащите узел шнека ледогенератора из своего гнезда в корпусе.

Оставьте узел висеть, чтобы получить доступ к его разъемам.

Шаг 10 Отсоедините шнек ледогенератора в сборе

Whirlpool Refrigerator Dispenser Solenoid Replacement, Disconnect the icemaker auger assembly: step 10, image 1 of 3Whirlpool Refrigerator Dispenser Solenoid Replacement, Disconnect the icemaker auger assembly: step 10, image 2 of 3Whirlpool Refrigerator Dispenser Solenoid Replacement, Disconnect the icemaker auger assembly: step 10, image 3 of 3

Отсоедините все разъемы, подключенные к шнеку ледогенератора в сборе.

Шаг 11 Снимите шнек ледогенератора в сборе

Whirlpool Refrigerator Dispenser Solenoid Replacement, Remove the icemaker auger assembly: step 11, image 1 of 1

Снимите шнек ледогенератора в сборе.

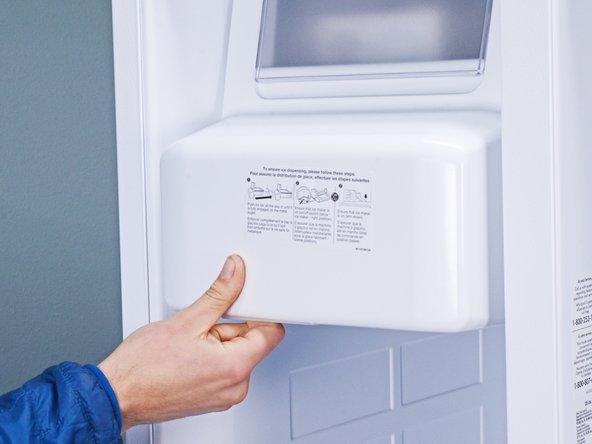
Шаг 12 Снимите диспенсер

Whirlpool Refrigerator Dispenser Solenoid Replacement, Remove the dispenser: step 12, image 1 of 3Whirlpool Refrigerator Dispenser Solenoid Replacement, Remove the dispenser: step 12, image 2 of 3Whirlpool Refrigerator Dispenser Solenoid Replacement, Remove the dispenser: step 12, image 3 of 3

Выдвиньте головку дозатора из гнезда в узле шнека льдогенератора.

Шаг 13

Whirlpool Refrigerator Dispenser Solenoid Replacement: step 13, image 1 of 2Whirlpool Refrigerator Dispenser Solenoid Replacement: step 13, image 2 of 2

Извлеките головку дозатора из металлического соленоида.

Шаг 14 Снимите ленту

Whirlpool Refrigerator Dispenser Solenoid Replacement, Remove the tape: step 14, image 1 of 3Whirlpool Refrigerator Dispenser Solenoid Replacement, Remove the tape: step 14, image 2 of 3Whirlpool Refrigerator Dispenser Solenoid Replacement, Remove the tape: step 14, image 3 of 3

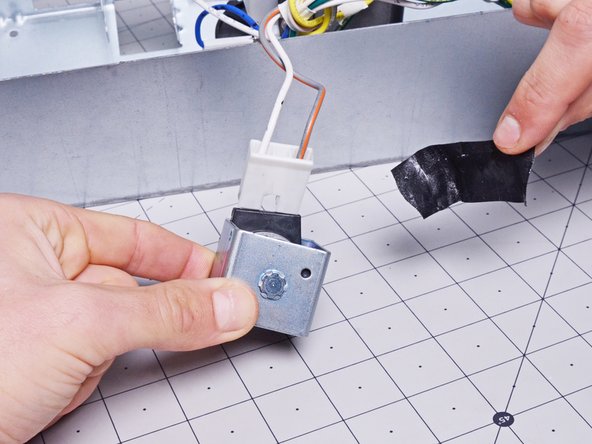
Отклейте ленту с разъема соленоида.

Отложите ленту в сторону. Она пригодится вам при сборке.

Шаг 15 Отсоедините соленоид

Whirlpool Refrigerator Dispenser Solenoid Replacement, Disconnect the solenoid: step 15, image 1 of 3Whirlpool Refrigerator Dispenser Solenoid Replacement, Disconnect the solenoid: step 15, image 2 of 3Whirlpool Refrigerator Dispenser Solenoid Replacement, Disconnect the solenoid: step 15, image 3 of 3

Отсоедините разъем, прикрепленный к соленоиду.

Шаг 16 Измерьте соленоид

Whirlpool Refrigerator Dispenser Solenoid Replacement, Meter the solenoid: step 16, image 1 of 1

Если у вас есть мультиметр, вы можете проверить сопротивление соленоида.

Диапазон между 10-500Ω является приемлемым. Более подробную информацию можно найти в спецификации соленоида вашего холодильника. Соленоид, изображенный на фото, имеет сопротивление 33,9 Ом.

Комментировать
65 просмотров
Комментариев нет, будьте первым кто его оставит

Это интересно
No Image Гайды
0 комментариев
No Image Гайды
0 комментариев
No Image Гайды
0 комментариев