
Введение
В этом руководстве показано, как заменить оболочку пульта Wii. Существует множество причин для смены корпуса. Например
Давайте приступим к описанию!
Шаг 1 Снятие ремешка (необязательно, но рекомендуется).

Снимите защитный ремешок, чтобы он не мешал нам.
Шаг 2 Извлечение батарей


Извлеките батарею, подцепив ее ногтем.
Шаг 3 Откручивание винтов


Здесь начинается разборка, возьмите отвертку Y1 и открутите следующие винты.
Шаг 4 Проникните внутрь
Аккуратно снимите переднюю крышку
Шаг 5 Извлечение кнопок


Отсоедините все кнопки на материнской плате
Шаг 6 Снятие резины

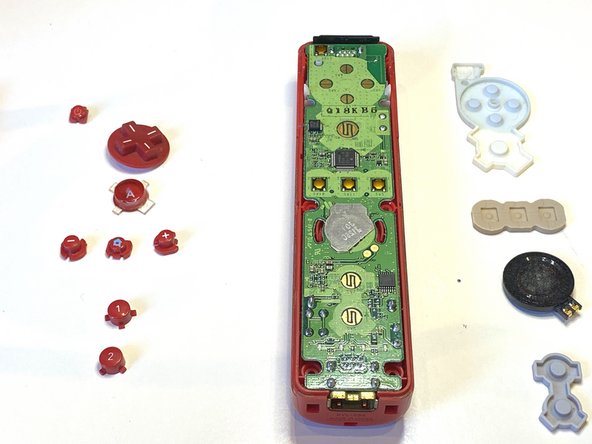
Снимите всю резину.
Шаг 7 Извлечение материнской платы


Выньте материнскую плату
Шаг 8 Извлечение кнопки B


Извлеките кнопку B
Шаг 9 Извлечение кнопки B


Извлеките кнопку B
Шаг 10 Получение новой оболочки

Возьмите новую оболочку
Шаг 11 Вставка компонентов


Вставьте все кнопки
Убедитесь, что они правильно вставлены и нажимаются.
Шаг 12 Вставка резины


Наденьте резину на все кнопки.
Шаг 13 Вставка кнопки B
Подключите кнопку B
Шаг 14 Закрытие пульта
Аккуратно установите заднюю крышку на пульт wii
Шаг 15 Прикручивание

Вкрутите винты Y1 в следующие места
