No Image

Замена кнопок пульта дистанционного управления Logitech Harmony Smart Control

74 просмотров
17 декабря 2023

Шаг 1 Кнопки пульта ДУ

Logitech Harmony Smart Control Remote Buttons Replacement, Remote Buttons: step 1, image 1 of 2Logitech Harmony Smart Control Remote Buttons Replacement, Remote Buttons: step 1, image 2 of 2

Большими пальцами обеих рук сдвиньте рифленую крышку с торца пульта.

После снятия крышки извлеките батарею.

Шаг 2

Logitech Harmony Smart Control Remote Buttons Replacement: step 2, image 1 of 2Logitech Harmony Smart Control Remote Buttons Replacement: step 2, image 2 of 2

С помощью биты PH00 открутите оба 4-миллиметровых винта Phillip на пульте.

Шаг 3

Logitech Harmony Smart Control Remote Buttons Replacement: step 3, image 1 of 2Logitech Harmony Smart Control Remote Buttons Replacement: step 3, image 2 of 2

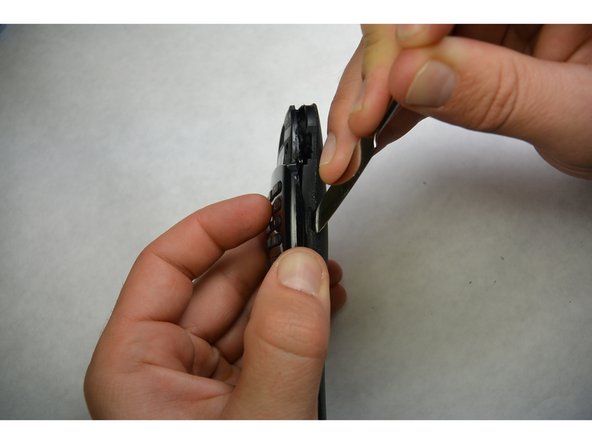
С помощью металлической лопатки подденьте пульт. Маневрируйте, чтобы отделить обе стороны.

Шаг 4

Logitech Harmony Smart Control Remote Buttons Replacement: step 4, image 1 of 3Logitech Harmony Smart Control Remote Buttons Replacement: step 4, image 2 of 3Logitech Harmony Smart Control Remote Buttons Replacement: step 4, image 3 of 3

Вручную отделите два куска пластика.

С помощью металлической части корпуса подденьте печатную плату. Не отсоединяйте ничего.

Когда плата будет подцеплена, выдвиньте ее из корпуса.

Шаг 5

Logitech Harmony Smart Control Remote Buttons Replacement: step 5, image 1 of 1

С передней части пульта снимите кнопки. Очистите или замените необходимые кнопки.

Комментировать
74 просмотров
Комментариев нет, будьте первым кто его оставит

Это интересно
No Image Гайды
0 комментариев
No Image Гайды
0 комментариев
No Image Гайды
0 комментариев