No Image

Замена дисплея Samsung Galaxy A50 в сборе с рамкой

84 просмотров
10 декабря 2023

Шаг 1 Замена ЖК-дисплея в сборе

Samsung Galaxy A50 Display Assembly with Frame Replacement, LCD Display Assembly replacement: step 1, image 1 of 3Samsung Galaxy A50 Display Assembly with Frame Replacement, LCD Display Assembly replacement: step 1, image 2 of 3Samsung Galaxy A50 Display Assembly with Frame Replacement, LCD Display Assembly replacement: step 1, image 3 of 3

Сенсорный дисплей дигитайзера в сборе с рамкой для Samsung Galaxy A50

Шаг 2 Снятие крышки аккумулятора

Samsung Galaxy A50 Display Assembly with Frame Replacement, Battery cover removal: step 2, image 1 of 3Samsung Galaxy A50 Display Assembly with Frame Replacement, Battery cover removal: step 2, image 2 of 3Samsung Galaxy A50 Display Assembly with Frame Replacement, Battery cover removal: step 2, image 3 of 3

Нагрейте заднюю крышку, чтобы ослабить клей.

Чтобы отделить заднюю крышку, используйте присоску и пластиковые инструменты.

Шаг 3 Снятие средней рамки

Samsung Galaxy A50 Display Assembly with Frame Replacement, Middle frame removal: step 3, image 1 of 3Samsung Galaxy A50 Display Assembly with Frame Replacement, Middle frame removal: step 3, image 2 of 3Samsung Galaxy A50 Display Assembly with Frame Replacement, Middle frame removal: step 3, image 3 of 3

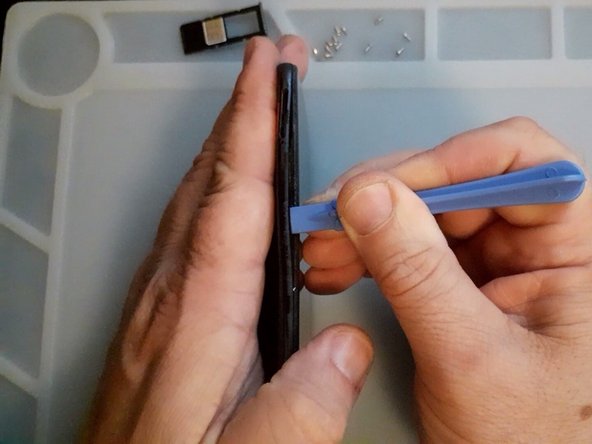
Извлеките лоток для SIM-карты.

Выкрутите винты Philips.

Снова используйте пластиковые инструменты, чтобы отделить среднюю рамку.

Шаг 4 Проверка новой запасной части

Samsung Galaxy A50 Display Assembly with Frame Replacement, Test the new spare part: step 4, image 1 of 3Samsung Galaxy A50 Display Assembly with Frame Replacement, Test the new spare part: step 4, image 2 of 3Samsung Galaxy A50 Display Assembly with Frame Replacement, Test the new spare part: step 4, image 3 of 3

Сначала отсоедините аккумулятор.

Проверьте новую запасную часть перед установкой.

Шаг 5 Снятие логической платы

Samsung Galaxy A50 Display Assembly with Frame Replacement, Logic board removal: step 5, image 1 of 3Samsung Galaxy A50 Display Assembly with Frame Replacement, Logic board removal: step 5, image 2 of 3Samsung Galaxy A50 Display Assembly with Frame Replacement, Logic board removal: step 5, image 3 of 3

Отсоедините и извлеките главный гибкий кабель.

Выкрутите черный винт Philips, он короче, чем винты средней рамки.

Отсоедините коаксиальный антенный кабель.

Теперь вы можете снять логическую плату.

Шаг 6 Снятие логической платы

Samsung Galaxy A50 Display Assembly with Frame Replacement, Sub board removal: step 6, image 1 of 3Samsung Galaxy A50 Display Assembly with Frame Replacement, Sub board removal: step 6, image 2 of 3Samsung Galaxy A50 Display Assembly with Frame Replacement, Sub board removal: step 6, image 3 of 3

Сначала снимите датчик отпечатков пальцев.

Винты для датчика отпечатков пальцев короче.

Перед демонтажем платы лучше воспользоваться горячим воздухом.

Напоминание — только пластиковые инструменты 🙂

Шаг 7. Извлечение аккумулятора

Samsung Galaxy A50 Display Assembly with Frame Replacement, Battery removal: step 7, image 1 of 3Samsung Galaxy A50 Display Assembly with Frame Replacement, Battery removal: step 7, image 2 of 3Samsung Galaxy A50 Display Assembly with Frame Replacement, Battery removal: step 7, image 3 of 3

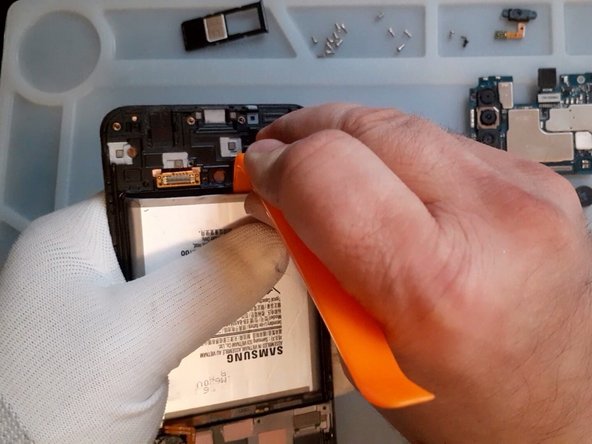
Снова горячий воздух, пластиковые инструменты и очень медленное извлечение аккумулятора.

Шаг 8

Samsung Galaxy A50 Display Assembly with Frame Replacement: step 8, image 1 of 1

Все хорошо, что хорошо кончается

Комментировать
84 просмотров
Комментариев нет, будьте первым кто его оставит

Это интересно
No Image Гайды
0 комментариев
No Image Гайды
0 комментариев
No Image Гайды
0 комментариев