No Image

Le Pavé Parisien: замена бетонной оболочки

77 просмотров
09 декабря 2023

Шаг 1 Снимите решетку

Le Pavé Parisien: Replacement of the Concrete Shell, Remove the grid: step 1, image 1 of 2Le Pavé Parisien: Replacement of the Concrete Shell, Remove the grid: step 1, image 2 of 2

Снимите защитную решетку динамика, предварительно приподняв один из 4 углов.

Шаг 2 Открутите динамик

Le Pavé Parisien: Replacement of the Concrete Shell, Unscrew the speaker: step 2, image 1 of 2Le Pavé Parisien: Replacement of the Concrete Shell, Unscrew the speaker: step 2, image 2 of 2

Открутите 4 винта динамика, используя динамометрическую отвертку для винтов M4.

Шаг 3 Отсоедините динамик

Le Pavé Parisien: Replacement of the Concrete Shell, Disconnect the speaker: step 3, image 1 of 2Le Pavé Parisien: Replacement of the Concrete Shell, Disconnect the speaker: step 3, image 2 of 2

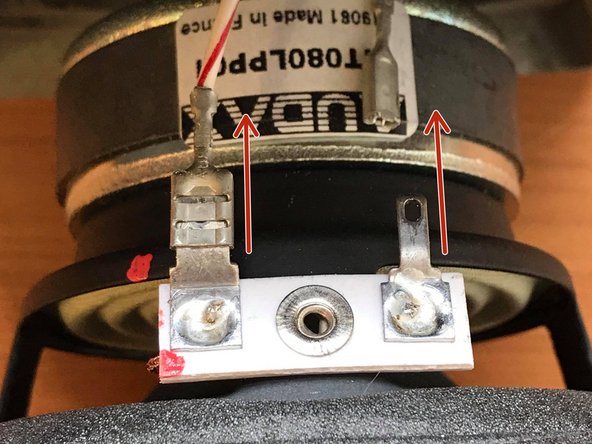
Вытащите динамик из бетонного корпуса, чтобы обеспечить доступ к соединениям.

Чтобы отсоединить динамик, потяните каждый из двух кабелей вниз за их разъем, делая небольшие движения влево-вправо.

Шаг 4 Снимите бетонную оболочку

Le Pavé Parisien: Replacement of the Concrete Shell, Remove the concrete shell: step 4, image 1 of 2Le Pavé Parisien: Replacement of the Concrete Shell, Remove the concrete shell: step 4, image 2 of 2

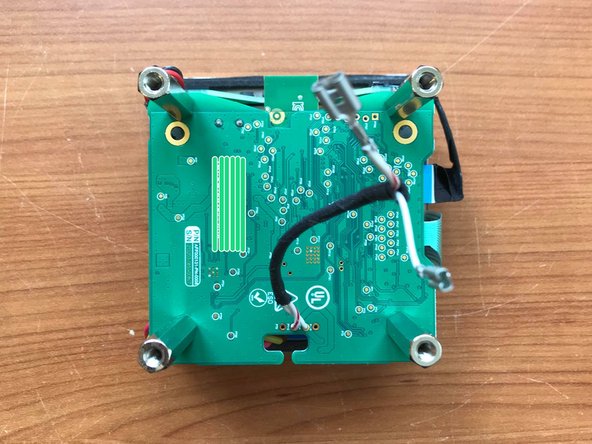
Извлеките динамик из бетонного корпуса.

Когда бетонный корпус и электронная корзина будут разделены, приподнимите бетонный корпус, чтобы отделить его от корзины.

Шаг 5 Установите новую бетонную оболочку

Le Pavé Parisien: Replacement of the Concrete Shell, Place the new concrete shell: step 5, image 1 of 3Le Pavé Parisien: Replacement of the Concrete Shell, Place the new concrete shell: step 5, image 2 of 3Le Pavé Parisien: Replacement of the Concrete Shell, Place the new concrete shell: step 5, image 3 of 3

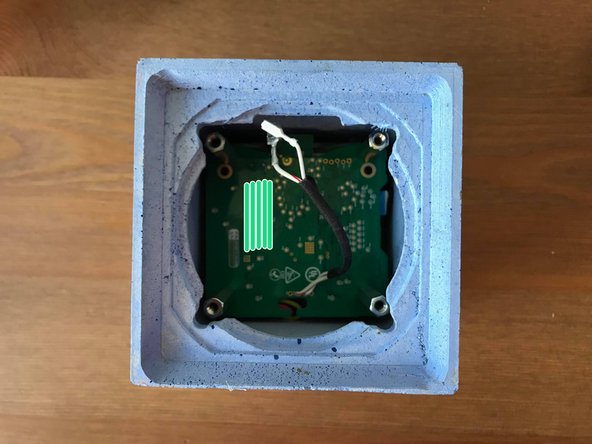
Нижняя сторона бетонной оболочки отличается от остальных, поэтому будьте осторожны, чтобы правильно ее расположить.

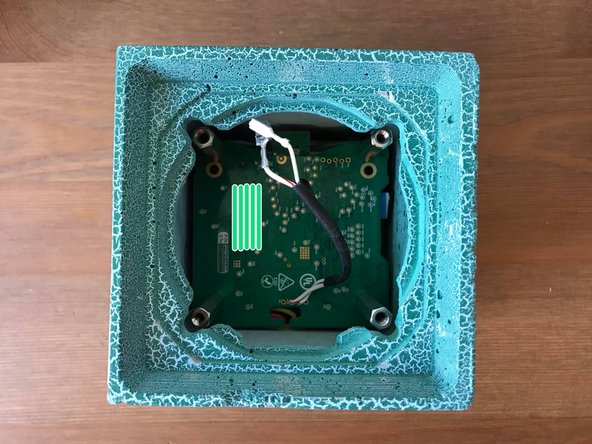
Шаг 6 Поместите динамик в бетонную оболочку

Le Pavé Parisien: Replacement of the Concrete Shell, Place the speaker in the concrete shell: step 6, image 1 of 2Le Pavé Parisien: Replacement of the Concrete Shell, Place the speaker in the concrete shell: step 6, image 2 of 2

Подключите динамик, как в шаге 3. Будьте осторожны и поместите разъемы динамика на ту сторону бетонной оболочки, которая имеет выемку.

Шаг 7 Завершение

Le Pavé Parisien: Replacement of the Concrete Shell, End: step 7, image 1 of 1

Осталось только прикрутить все обратно и установить защитную сетку: ваша Pavé Parisien собрана!

Комментировать
77 просмотров
Комментариев нет, будьте первым кто его оставит

Это интересно
No Image Гайды
0 комментариев
No Image Гайды
0 комментариев
No Image Гайды
0 комментариев